OCS Inventory NG Agent 2.X on Windows Operating Systems
| Agent Version | Compatibility Note |
|---|---|
| 2 . X | Does not work on Windows 9X, Windows Millennium Edition or Windows NT4. You need to use old 1.X agent 4061-1. |
| 2 . 1 . 1 . 1 | On Windows XP and 2003R2 you can only use this Windows agent version. |
| 2 . 6 | Agent is only installable on 64-bit machines. |
| 2.6.0.1 | Agent is only installable on 64-bit machines. |
| 2.7.X.X and newer | Agent is installable on 64-bit and 32-bit machines. |
OCS Inventory NG Agent for Windows can run as a Windows service automatically at computer startup.
It can also work as a stand alone application which can be launched through a login script, an Active Directory GPO, a scheduled task or a shortcut in the Start menu.
Note: We recommend using the service version of the Agent, especially if you plan to use the package
deployment feature.
Download and unzip the latest Windows agent from the Downloads section. This package contains 1 file:
- OCS-NG-Windows-Agent-Setup.exe: installs the Windows Agent, either as a Windows Service or as a Standalone tool.
Which version: Service or Standalone ?
The Windows service version will automatically communicate with the OCS-NG system and perform inventories and package deployment based on parameters set on the server. The standalone client is used for computers that cannot communicate with the server, or where the service version is not wanted or allowed.
How does Windows Agent work ?
When the OCS Inventory NG Agent is launched, it queries the Communication server using the HTTP or HTTPS protocol. The server can answer “nothing” (not time for an inventory and no package to deploy), and the agent stops. Otherwise, the server may answer that Agent has to:
- Send an inventory: the agent retrieves all computer properties and sends them using HTTP or HTTPS protocol to the server. The server ask this only if the last inventory date in the database is older than the general option “FREQUENCY”, specified in days (see Managing OCS Inventory NG general options.)
- Discover the network: Agent scans his IP subnet for active devices listening on the network, then sends these data using HTTP or HTTPS protocol to the server. The server ask this only if the computer is elected to run IPDISCOVERY (see Using IP discovery feature.)
- Deploy a package: Agent contacts the deployment server using the HTTPS protocol to get the information file (file INFO which describes the package), downloads package fragments from the deployment server, rebuilds the package and launches it.
Since OCS Inventory Agent 2.6, it's possible to deploy package greater than 4GB (only on 64-bit versions). However, the deployment of such package may cause latency in machines on which it's deployed.
Note: The OCS Inventory NG Agent does not listen on the network. It only initiates communications to the server, so you do not have to open inbound port on a personal firewall. However, you must allow outbound connections from OCS Inventory NG agent files "OCSInventory.exe" and "Download.exe" to the Communication Server or Deployment Server using either HTTP or HTTPS.
Each time an inventory is done, the Agent uses and writes configuration files stored into folder “%ProgramData%\OCS Inventory NG\Agent”. This directory is usually
- C:\Documents and Settings\All Users\Application Data\OCS Inventory NG\Agent under Windows 2000, XP and 2003.
- C:\ProgramData\OCS Inventory NG\Agent under Windows Vista, 2008, Seven and 2008 R2.
It uses at least the following files:
- ocsinventory.ini: all configuration parameters for the agent (server address and credentials, proxy address and credentials, service properties...),
- ocsinventory.dat: computer unique identity file, based on MAC address and hostname,
- last_state: last inventory state, to detect changes between 2 inventory,
- history: package deployment history,
- All log files created by OCS Inventory NG Agent.
Note: YOU MUST STOP "OCS Inventory Service" to make changes on these files, because they are write protected while service is running. As is, only user having Administrator privileges can modify these files.
When launched for the first time, OCS Inventory NG agent will prompt user for the TAG value (if this feature is enabled). Help text displayed in the dialog-box is the one you have entered in Configuring management server. User may enter this value, or leave it blank (you will be able to update this value through the Administration server).
Then (or otherwise if TAG feature is not enabled), it will do the inventory and send inventory results to Communication server using HTTP or HTTPS.
Note: When the agent is first launched, it will only generate and send an inventory.
How does Windows service work?
Note: You must have Administrator privileges to set up OCS Inventory NG Agent as a service, or you may use OCS Inventory NG Packager to create an installer able to run even if user do not
have Administrator privileges. Refer to
Uploading Agent for deployment through launcher “OcsLogon.exe”
or OCS Inventory NG Packager documentation.
- OCS Inventory NG Agent “OCSInventory.exe” is launched by service “OcsService.exe” every PROLOG_FREQ hours. It keeps trace of the countdown in seconds in file “ocsinventory.ini” (value TTO_WAIT), so it is the time of EFFECTIVE run.
- The number of hours to wait is randomized at install time and each time PROLOG_FREQ is changed in Administration Console.
- It allows not having all agents contacting Communication Server at the same time. The randomization is between 0 and PROLOG_FREQ (10 hours by default). You can adjust these parameters considering your server load using Administration Console.
When service launch agent, it call without parameter, so agent uses parameters specified in file “ocsinventory.ini”.
As you can see, Service is only a launcher which will run Agent regularly, even if nobody logs in the computer.
Do I have to use service or standalone agent ?
- You want to have computers inventoried, even if nobody log in ? Use Service version.
- You want to use package deployment feature ? Use service version. As is, package will be downloaded in background, and logged in user can continue to work.
- You do not want to set service up or have anything appears in the registry ? Use standalone version. However, deployment of package may take a long time when users log in.
In other words, we recommend using service version.
Manually installing OCS Inventory NG Agent for Windows.
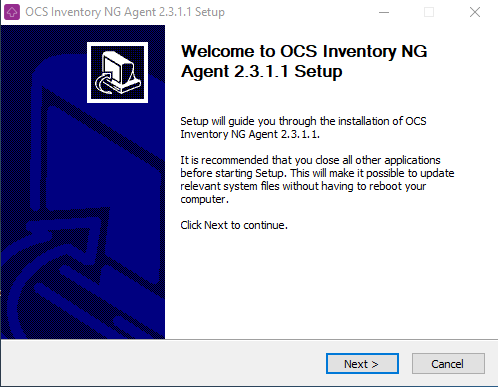
Run “OCS-NG-Windows-Agent-Setup.exe” on client computer..
..and click “Next” button
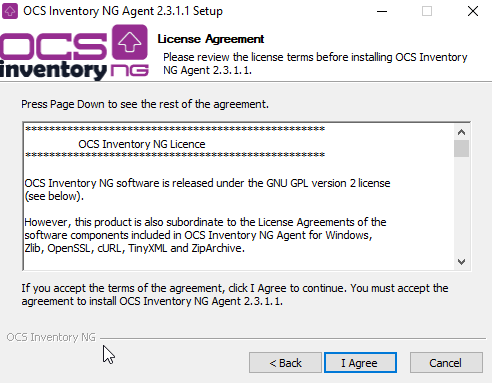
Validate license agreement by clicking “I agree” button.
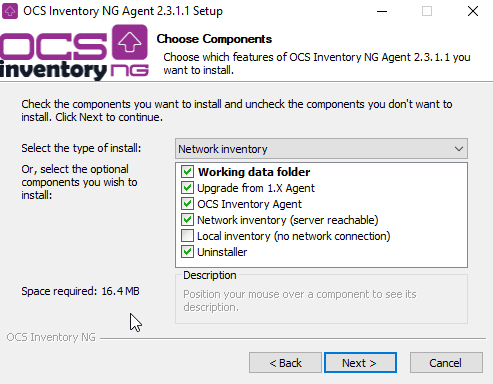
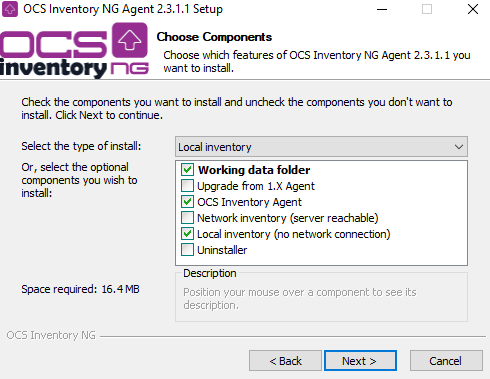
Select the installation type you want:
- Network inventory: Computer can reach OCS Inventory NG Server through the network, and so, Agent will be launched using either a Windows Service, or a Logon/GPO script.
- Local inventory: Computer is not connected to a network, or will never be able to reach OCS Inventory NG Server. You can generate an inventory of this computer and save to file to be imported later on server (see chapter Generating inventory of a non network connected Windows computer below).
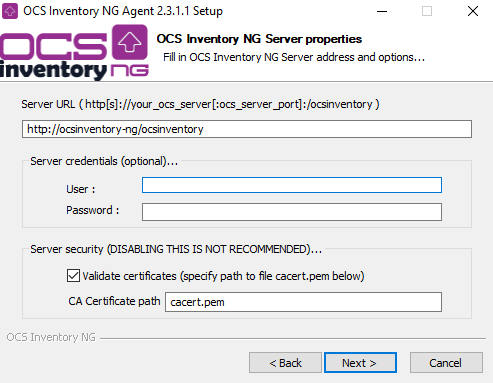
Fill in OCS Inventory NG Communication server URL, like
http://your_ocs_server_address:your_server_port/ocsinventory
. You can also specify https if your server is SSL enabled to secure communication.
If you've protected your Communication Server access with credentials, you must specify credentials
agent will use to authenticate (these credentials will be encrypted to be stored into configuration file).
If you're aware of server certificate validation when using HTTPS protocol, either for sending inventory
or deploying package, you can disable it. However, this is a security flaw! We do not recommend disabling
certificate validation because Agent does not authenticate server. With certificate validation enabled,
you must specify path to Certificate Authority root certificate (default uses
"%ProgramData%\OCS Inventory NG\Agent\cacert.pem"). Then click “Next” button.
Note: You can use self-signed certificate, but certificate CN must equal to server address used by agents
for communications. Also, if full path to certificate is not provided, agent will try to load the specified
file from its data folder "%ProgramData%\OCS Inventory NG\Agent".
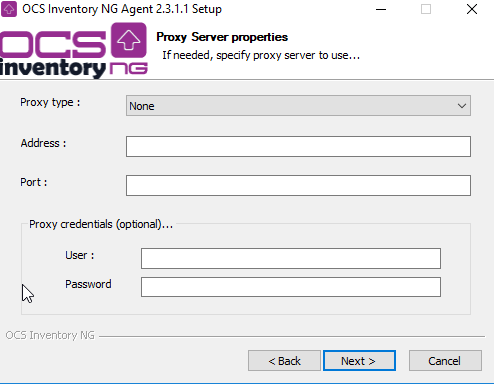
If needed, select proxy type to use to connect to Communication Server, proxy address and port, and proxy credentials if required (these credentials will be encrypted to be stored into configuration file). Agent support HTTP, SOCKS 4 and SOCKS 5 proxies.
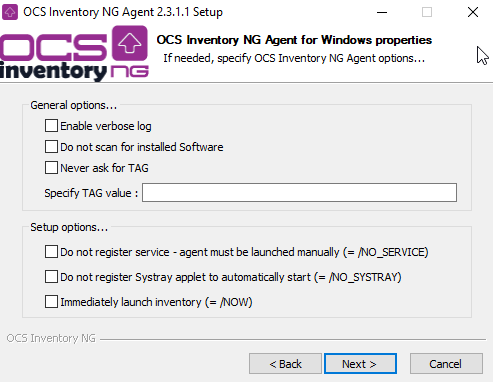
By default, OCS Inventory Agent write only few information in log files. You may increase this enabling “Verbose log”. You may also disable TAG question, or specify the TAG value. Last, indicate which level of system integration you need:
- Do not register service using LocalSystem account (i.e, use standalone agent, which must be launched manually or using login script).
- Do not configure OCS Inventory NG Systray Applet to start automatically when user log in. This applet allows user to manually run agent, or to display inventory information. Disabling this option does not create shortcut link in "All users" startup menu.
- Launch inventory just at the end of setup.
By default, OCS Inventory agent use the WBEM_FLAG_RETURN_WBEM_COMPLETE flag WMI to retrieve its data. However in some cases, this can trigger additional queries to the domain controller.
With the 2.9.1.0 agent, there is the possibility to set the flag to two different mode :
- WBEM_FLAG_RETURN_WBEM_COMPLETE
- WBEM_FLAG_DIRECT_READ
The WBEM_FLAG_DIRECT_READ flag will only read WMI information present directly on the system and won't trigger any query to the domain controller.
Please note the use of this flag will most likely result in information loss.
Possible agent configuration :
- COMPLETE (default) : Allow full WMI query
- READ : Read only WMI queries (might lead to inventory data loss)
The READ mode of the agent also comes with a DEFAULT_USER_DOMAIN configuration. Using the read flag will in most of the case make the agent unable to retrieve the current active directory domain user.
Setting DEFAULT_USER_DOMAIN will allow to set a default connected user.

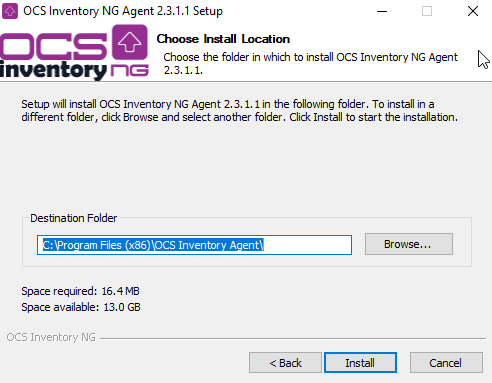
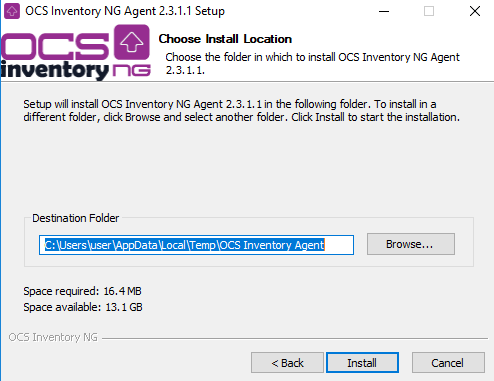
Choose destination folder, “C:\Program Files\OCS Inventory Agent” by default (“C:\Program Files (x86)\OCS Inventory Agent” under Windows 64 bits), and click “Install” button.
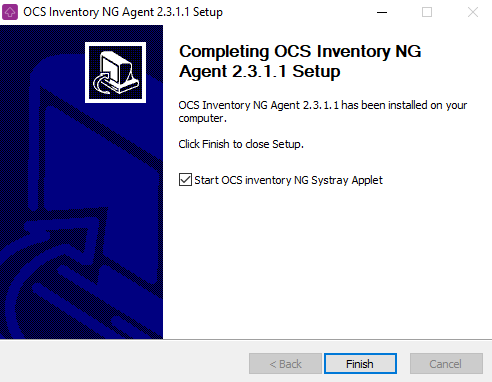
Click “Finish” button to close OCS inventory NG Agent Setup.
This is the interactive installation setup. However, this process requires that you launch it under all your computers. Hopefully, this installation can be scripted.
OCS Inventory NG Agent for Windows Setup command line options
Service Agent setup "OCS-NG-Windows-Agent-Setup.exe" may be called with some command line parameters:
- /S to run the installer in silent mode, no interaction with user
- /NOSPLASH disable splash screen when installer starts
- /NO_SERVICE to not register OCS Inventory NG Agent into Windows Service Manager. Agent can only be launched manually or through a script/GPO.
- /NO_SYSTRAY to not create a shortcut into "All Users" startup folder to start systray applet when user log in.
- /NOW to launch inventory just after setup
- /NOSOFTWARE to ignore software installed
- /D to install ocsinventory agent in an another directory (default %PROGRAMFILES%\ocs inventory agent)
Note: Please, don't use OCSPackager to upgrade OCS Inventory Windows Agent. Create deployement package with "OCS-NG-Windows-Agent-Setup.exe" on zip file and launch with command example : OCS-NG-Windows-Agent-Setup.exe /S /SERVER=ocs_server_address
Also, you can pass to the installer the following agent's command line parameters (see agent's options below for more detail):
- /SERVER=
- /USER=
- /PWD=
- /SSL=
- /CA=
- /PROXY_TYPE=
- /PROXY=
- /PROXY_PORT=
- /PROXY_USER=
- /PROXY_PWD=
- /DEBUG=
- /NOTAG
- /TAG=
- /D=
- /WMI_FLAG_MODE=
- /DEFAULT_USER_DOMAIN=
Deploying or running Agent through Active Directory GPO
Note: We recommend using service version of Agent if you plan to use package deployment feature.
To deploy the agent using GPO we recommand you to create a standalone packager with all your configuration already provisionned. See using OCS Packager to create an all-in-one installer to setup agent and server certificate
After creating a packager, you will need to store it at a place where all your users have access to.
Then create a GPO that trigger on user login. You will have a create a script that call the packager executable and trigger the installation on the computer.
Here is a sample script:
@echo off

rem Script that call the packager executable on shared file system

rem Installing our packager
"myfileserver/my/path/packager.exe"
Using PSEXEC or "OCS Inventory NG Agent Deployment Tool" to push OCS Inventory NG Agent
PSEXEC from Microsoft ( https://technet.microsoft.com/fr-fr/sysinternals/psexec ) is a great and fast way to install the OCS agents on all Windows computers, you can literally setup most of your computers in a few hours (assuming they are all connected to the network, that is).
Note: We've created a graphical tool for Windows, OCS Inventory NG Agent Deployment Tool, which allows
you to use PSEXEC more easily. It is able to push agent's installation on up to 10 computers simultaneously,
and also to copy the certificate used to authenticate deployment server in OCS Inventory NG data folder.
Some tips:
PSEXEC is best used together with Domain Logon scripts or Active Directory GPO:
- Use the PSEXEC to install on all computers that are currently connected to the network (best used during business hours).
- Then add a logon script/GPO as described above to install on computers that were offline the next time they connect to the network.
- If you really don't want to use logon script/GPO, you can create and monitor a response file to get a list of computers that were not deployed for any reason, and then rerun PSEXEC just for these computers.
PSEXEC Usage examples:
We assume that the agent setup file is called agentsetup.exe and it was placed on a shared folder accessible to all users.
-
Install silently on all computers currently logged in your domain:
psexec \\* -s \\Server\NetLogon\OCS-NG-Windows-Agent-Setup.exe /S /NOSPLASH /SERVER=http://my_ocs_server/ocsinventory -
Install silently on a single computer:
psexec \\COMPUTER_NAME -s \\Server\NetLogon\OCS-NG-Windows-Agent-Setup.exe /S /NOSPLASH /SERVER=http://my_ocs_server/ocsinventory -
Install silently on all computers using the domain administrator credentials:
psexec \\* -s -u Domain\Administrator -p Password \\Server\NetLogon\OCS-NG-Windows-Agent-Setup.exe /S /NOSPLASH /SERVER=http://my_ocs_server/ocsinventory -
Install silently on specific computers (ALL.TXT is a text file that lists target computer names, one per line), using domain administrator credentials:
psexec @ALL.TXT -s -u Domain\Administrator -p Password \\Server\NetLogon\OCS-NG-Windows-Agent-Setup.exe /S /NOSPLASH /SERVER=http://my_ocs_server/ocsinventory
Generating inventory of a non network connected Windows computer
Run “OCS-NG-Windows-Agent-Setup.exe” on client computer, from an USB stick for example...
..and click “Next” button.
Validate license agreement by clicking “I agree” button.
Select Local inventory installation type.
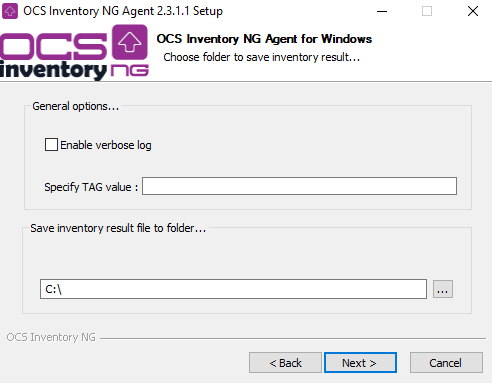
By default, OCS Inventory Agent writes only few lines in the log files. You may increase this enabling “Verbose log”. You may also specify the TAG value. Last, indicate the folder where you want to store generated inventory file, your usb stick for example:
In local inventory mode, Agent will be installed into a temporary folder (we recommend not changing this folder, it will be automatically deleted at the end of process), Click “Install” button to start process. Agent is installed into temporary folder, launched to generate a ".ocs" inventory file stored in the folder you've specified, and then removed from computer.
Click “Finish” button to close OCS inventory NG Agent Setup.
This is the interactive process, but it can be scripted using /LOCAL=path_to_folder_where_to_store_ocs_file command line switch.
For example, you can use OCS-NG-Windows-Agent-Setup.exe /S /LOCAL=C:\ to silently generate ".ocs" inventory file into folder c:.
Once you've transfered generated inventory file, you will be able to import it into the inventory database of OCS Inventory NG Server, through the Administration Console.
OCS Inventory NG Agent for Windows command line options
OCS Inventory NG Agent version 2.0 or higher includes some command line switches to allow detecting errors.
Once agent is installed, you can run it manually to diagnose problems. Use “C:\Program Files\OCS Inventory Agent\OCSInventory.exe [options]” command line where [options] may be in the following command line switches.
| Command Line Options | Meaning |
|---|---|
| /work_dir="path to directory" | Agent must use "path to directory" as working dir (this directory may included configuration file). Default is "%ALLUSERSPROFILE%\Application Data\OCS Inventory NG\Agent" or "%PROGRAMDATA%\OCS Inventory NG\Agent" |
| /local[="path to folder"] | Agent do not contact communication server, and store inventory in xml compressed .ocs file into folder "path to folder". If no "path to folder" provided, agent assume folder as data folder |
| /debug[=level] | Generate a very verbose log file "ocsinventory.log" into agent's install folder. 0 => disable verbose logs (default) 1 => enable default verbose logs (default when no level provided provided) 2 => enable debuging logs |
| /notag | Agent must NOT prompt user for TAG in any case |
| /tag="my value" | Agent must set "my value" as TAG value |
| /xml=["path to folder"] | Agent must store inventory in uncompressed xml format into folder "path to folder". If no "path to folder" provided, agent assume folder as data folder |
| /force | Always send inventory, even if server do not ask for it (use only for debugging purpose !) |
| /ipdisc="network number" | Agent must launch IP discovery on network "network number" (use only for debugging purpose !) |
| /ipdisc_lat="number of milliseconds" | Set latency between 2 IP Discover requests to "number of milliseconds" |
| /fastip | Never wait for latency between 2 IP Discover requests (use only for debugging purpose !) |
| /hkcu | Search also for software under HKEY_CURRENT_USER registry hive (do not work with service as LocalSystem !) |
| /uid | Agent must generate a new unique device ID |
| /server=http[s]://server.domain.tld[:port]/ocsinventory | Agent try to connect to Communication Server address and port Listening on http[s]://server.domain.tld[:port]/ocsinventory |
| /ssl=0/1 | When usng SSL connections: 0 => SSL without certificate validation 1 => SSL with server certificate validation required (needs CA certificate) |
| /ca="path_to_cabundle.pem" | Path to CA certificate chain file in PEM format, for server certificate validation |
| /user=username /pwd=password | Communication Server authentication credentials |
| /proxy_type=0/1/2/3 | Agent proxy use 0 => no 1 => HTTP proxy 2 => Socks 4 proxy 3 => Socks 5 proxy |
| /proxy=proxy_address | Proxy server address (without protocol !) |
| /proxy_port=port | Proxy server port |
| /proxy_user=username | Proxy authentication credentials |
| /proxy_pwd=password | Proxy authentication credentials |
| /D=/ |
specify the directory where your want to install ocsinventory agent (default %PROGRAMFILES%\ocs inventory agent) |
| /wmi_flag_mode=[COMPLETE/READ] | WMI flag mode used by the agent |
| /default_user_domain=default.user | Read only WMI queries (might lead to inventory data loss) |
Sample configuration file "ocsinventory.ini"
[OCS Inventory Agent]
; OCS Inventory NG Agent features
; Enable debugging mode (0 => disabled, 1 => enabled, 2=> trace all)
Debug=1
; Enable local inventory mode (path to folder to store .ocs file => enabled,
; empty => disabled)
Local=
; Enable agent scanning HKEY_CURRENT_USER hive for printers and sofware
; (0 => disabled, 1 => enabled)
HKCU=0
; Disable prompting user for TAG value (0 => prompt allowed, 1 => disabled)
NoTAG=0
; Force agent launching IpDiscover on specified network (network address => enabled,
; empty disabled)
IpDisc=
; Which communication provider to use
; Name of communication DLL and configuration section to use
; DLL must be in "com" sub directory
ComProvider=ComHTTP.dll
; Behavior of WMI calls
; COMPLETE => Allow WMI full WMI queries
; READ => Not allow
WMI_FLAG_MODE=COMPLETE
; Read only WMI queries (might lead to inventory data loss)
DEFAULT_USER_DOMAIN=

[HTTP]
; OCS Inventory NG Communication Server address and port
; Listening on http[s]://server[:port]/ocsinventory
Server=http://localhost/ocsinventory
; Using SSL connections (0 => SSL without certificate validation,
; 1 => SSL with server certificate validation required)
SSL=0
; Path to CA certificate chain file in PEM format, for server certificate
; validation
CaBundle=D:\Developp\OCS Inventory NG\cacert.pem
; Using authentication on Communication Server (0 => no, 1 => yes)
AuthRequired=0
; Communication Server authentication credentials (encrypted)
User=
Pwd=
; Using proxy (0 => no, 1 => HTTP proxy, 2 => Socks 4 proxy, 3 => Socks 5 proxy)
ProxyType=0
; Proxy address and port
Proxy=
ProxyPort=
; Using proxy authentication (0 => no, 1 => yes)
ProxyAuthRequired=
; Proxy authentication credentials (encrypted)
ProxyUser=
ProxyPwd=


[OCS Inventory Service]
; Time to wait in minutes before next agent start
TTO_WAIT=1020
; Number of hour between 2 agent runs
PROLOG_FREQ=5
; Old value of PROLOG_FREQ
OLD_PROLOG_FREQ=10
Uninstalling the agent
Starting the 2.10.0.0, the Windows agent add some housecleaning option on the uninstaller.
Note : The uninstaller is present in the installation directory of the agent (uninst.exe)
If you uninstall the agent manually, you'll see a new window ask you if you desire to clean remaining agent files :
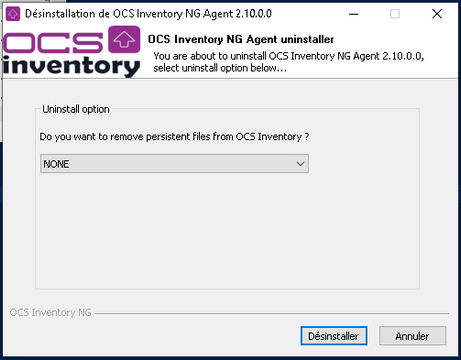
The agent provide three differents options in order to clean the configuration files and data files present on the %ProgramData% directory : NONE (Doesn't remove anything) ONLY CONFIGURATION (Remove the ocsinventory.ini and the Download folder) * ALL FILES (Completely remove the OCS Inventory NG folder in %ProgramData%)
Note : If you choose the last option and reinstall the agent later, it'll most likely lead to a duplicate in the webconsole since the agent will have to regenerate a deviceid (ocsinventory.dat)
You can also run the uninstaller programmatically with the /CLEAN option. It can be useful if you plan a mass uninstallation of the agent.
By default, if you run .\uninst.exe /S it won't clean the files in the %ProgramData% directory.
In order to only clean the files (ONLY CONFIGURATION), you can use : .\uninst.exe /S /CLEAN=FILES
To clean everything in the %ProgramData% directory (ALL FILES) : .\uninst.exe /S /CLEAN=ALL
Using the portable agent
The portable agent can be used if you are looking for a way to run the agent as a one time thing, without any installation.
-
The "RunPortableAgent.bat" script needs to be modified : edit OCS_SERVER_URL and OCS_CLIENT_TAG if needed.
-
Execute this same script to launch an inventory. Once this is done, run the "CleanPortableAgent.bat" script to clear the system from any agent related files.
Command line options for the Windows agent are also available for the portable agent.
When using them, you won't have to modify the script mentionned above, just navigate to the directory, edit the "ocsinventory.ini" file to configure the agent and launch "OCSInventory.exe" with any useful options.
Alternatively, you can provide configuration through the command line as well, and leave the .ini file as is.