Deployment template
Summary
How does it works ?
Since OCS Inventory 2.9, the deployment feature has been reworked. The new deployment options works by XML templates.
They are meant to be highly customizable and allow OCS users to create their own deployment process.
Theses templates are splitted in three different definitions : Operating system definition Deployment interactions (i.e. the actions perfomed on the remote system) * Deployment options (i.e. configuration of the deployment parameters)
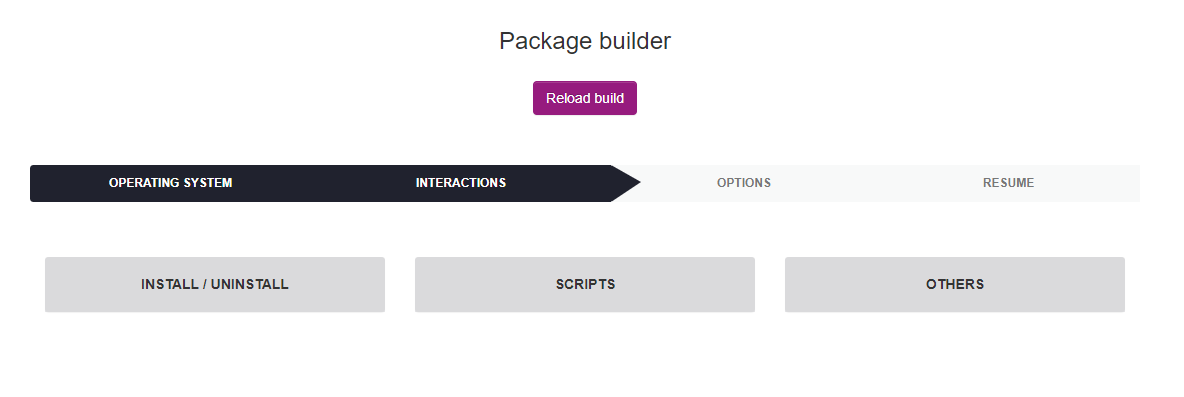
Create your template step by step
Create interaction file
The first step is to create your interaction file in ocsreports > config > teledeploy > interactions folder. In our example the file name is example.xml.
Edit this file and add the following lines :
<?xml version="1.0" encoding="UTF-8"?>
<interactiondefinition>
    <id>example</id>
    <name>9323</name>
    <refos>all</refos>
    <imgref>image/example.png</imgref>
    <linkedoptions>exampletopt</linkedoptions>
</interactiondefinition>
Explanations :
- id : name of the interaction that you want to create.
- name : translation number of your interaction title that will be displayed in the package build page.
- refos : name of the OS (windows / linux / macos).
- imgref : path to the icon that will be displayed in the package build page.
- linkedoptions : name of the options parameters file.
Save and close.
Declare interaction in operating systems
Now that we declared our interation we need to link it to a targeted operating systems. Edit the file ocsreports > config > teledeploy > operatingsystems > operatingsystems.xml and add your interaction line.
Interation line definition example :
<interaction order="{display_number}">{interaction_name}</interaction>
The interactions are divided in differents category :
Example to add interaction to Others category of Windows system :
<category id="otherswindows">
    <interaction order="1">store</interaction>
    <interaction order="2">custompackage</interaction>
    <interaction order="3">example</interaction> <-- Line to declare your custom interaction -->
</category>
Save and close.
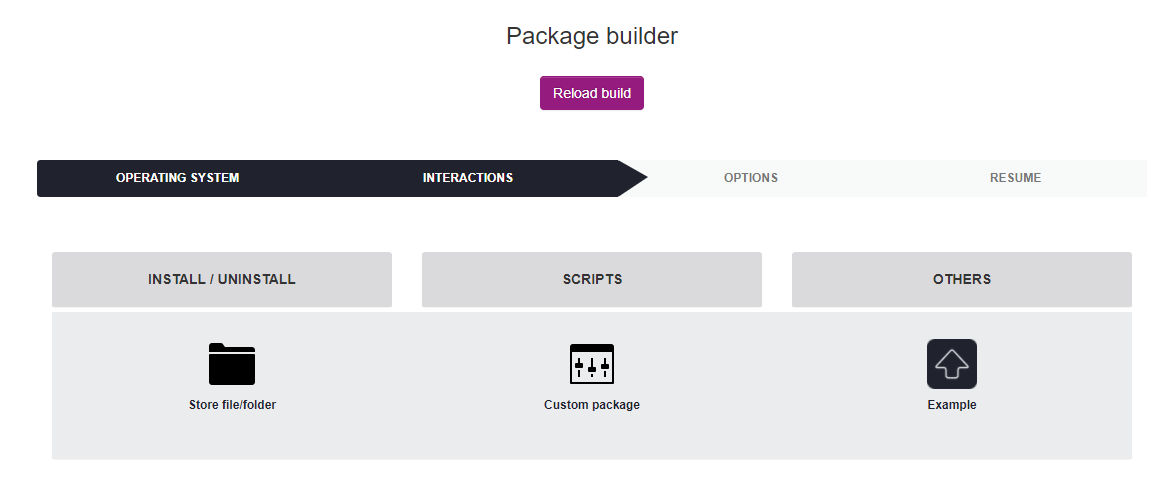
After setting the interaction, it will appear in the list in the selected category :
Create options file
Then, create the options file in ocsreports > config > teledeploy > options folder. In this case, the options name file is exampleopt.xml. Edit the options file and first, add the base XML code :
<?xml version="1.0" encoding="UTF-8"?>
<optionsdefinition>
    <id>exampleopt</id>
    <name>9312</name>
    <refint>example</refint>
    <replace>true</replace>

    <!-- Form options-->
    <formoption>
    </formoption>

    <!-- Package builder -->
    <packagebuilder>
    </packagebuilder>

    <!-- Package definition -->
    <packagedefinition>
    </packagedefinition>
</optionsdefinition>
Note : this is the minimum required code to have a working template, without it your deployment won't work
Explanations :
- id : name of the linked options that you delared in interaction file.
- name : translation number of your option title that will be displayed in the package build page.
- refint : name of the interaction.
- replace : true / false, set true if there are dynamic values on your XML. This setting will be detailled below
- formoption : form fields definition (More infos).
- packagebuilder : manage file and code upload (More infos).
- packagedefinition : default deployment values (More infos).
Form options
A form field is generated by a formblock XML tag with multiple parameters.
| XML Tag | Definition | Optionnal |
|---|---|---|
| id | Field identifier | NO |
| label | Correspond to the translation number of the label field | NO |
| mandatory | Is required ? (true / false) | NO |
| type | Field type (code / text / textarea / select / hidden / file) | NO |
| disabled | Is disabled ? (true / false) | NO |
| defaultvalue | Default field value | YES |
| description | Correspond to the translation number of the description field | YES |
| specialcharallowed | Are special chars allowed ? (true / false) | NO |
| javascript | Adding javascript function to the field | YES |
Text field formblock example :
<formblock>
    <id>example</id>
    <label>12000</label>
    <mandatory>false</mandatory>
    <type>text</type>
    <disabled>false</disabled>
    <defaultvalue>Example value</defaultvalue>
    <description>12001</description>
    <specialcharallowed>false</specialcharallowed>
    <javascript>onClick="javascriptFunctionExample(this);"</javascript>
</formblock>

Select formblock example :
<formblock>
    <id>SELECT</id>
    <label>12000</label>
    <mandatory>true</mandatory>
    <type>select</type>
    <disabled>false</disabled>
    <options>
        <option>
            <id>0</id>
            <name>12001</name>
        </option>
        <option>
            <id>1</id>
            <name>12002</name>
        </option>
    </options>
    <specialcharallowed>false</specialcharallowed>
</formblock>
| XML Tag | Definition | Optionnal |
|---|---|---|
| options | Parent TAG to declare select options | NO |
| option | Child TAG to declare select options | NO |
| id | Option identifier | NO |
| name | Translation number of the option | NO |
File form block example :
<formblock>
    <id>additionalfiles</id> <-- Don't change the id -->
    <label>12004</label>
    <mandatory>false</mandatory>
    <type>file</type>
    <disabled>false</disabled>
    <specialcharallowed>false</specialcharallowed>
</formblock>
Code form block example :
<formblock>
    <id>editorCode</id> <-- Don't change the id -->
    <label>12005</label>
    <mandatory>true</mandatory>
    <type>code</type>
    <language>batch</language> <-- Set your language code here -->
    <disabled>false</disabled>
    <defaultvalue/>
    <description/>
    <specialcharallowed>false</specialcharallowed>
</formblock>
<formblock> <-- This form block is mandatory for code editor and not editable -->
    <id>getcode</id>
    <label></label>
    <mandatory>false</mandatory>
    <type>hidden</type>
    <disabled>false</disabled>
    <defaultvalue/>
    <specialcharallowed>false</specialcharallowed>
</formblock>
Notice : The following formblocks are required and should not be changed except for the default value of FORMTYPE.
<formblock>
    <id>FORMTYPE</id>
    <label/>
    <mandatory/>
    <type>hidden</type>
    <disabled>false</disabled>
    <defaultvalue>exampleopt</defaultvalue> <-- Replace exampleopt by your options file name -->
    <specialcharallowed>false</specialcharallowed>
</formblock>
<formblock>
    <id>NAME</id>
    <label>1037</label>
    <mandatory>required</mandatory>
    <type>text</type>
    <disabled>false</disabled>
    <defaultvalue/>
    <specialcharallowed>false</specialcharallowed>
    <javascript>onkeyup="verifPackageName(this);"</javascript>
</formblock>
<formblock>
    <id>DESCRIPTION</id>
    <label>53</label>
    <mandatory>required</mandatory>
    <type>text</type>
    <disabled>false</disabled>
    <defaultvalue/>
    <specialcharallowed>true</specialcharallowed>
</formblock>
Package builder
The package builder is meant to manage FILE and CODE input the web form and inject them in the final deployment package.
There is two different configuration possible : codeasfile => get code form input and inject it as a script in the final deployment package filesinarchive => get uploaded file form input and inject it in the final deployment package
Codeasfile example :
<codeasfile>
    <filename>examplescript.bat</filename>
</codeasfile>
Behavior description : It will retrieve the data sent in the code form block and inject it with the name examplesript.bat. You can change the file name depending on which script type you want to execute.
Filesinarchive example :
<filesinarchive>
    <targetid>additionalfiles</targetid>
    <replacename>examplecript.bat</replacename>
</filesinarchive>
Behavior description : It will get the file input sent in the web form and inject it with the name examplesript.bat. You can change the file name depending on what you want to deploy.
Package definition
The pacakge definition refer to the configuration and command that will be executed by OCS Inventory agent upon package execution. It will also impact the way the deployment will be downloaded, on Windows it can also show an informative window to notice something to the enduser (i.e : inform the user to close a progam / that a software is gonna be updated).
<PRI>5</PRI>
<ACT>EXECUTE</ACT>
<PROTO>HTTP</PROTO>
<COMMAND>examplescript.bat</COMMAND>
<NOTIFY_USER>0</NOTIFY_USER>
<NOTIFY_TEXT/>
<NOTIFY_COUNTDOWN/>
<NOTIFY_CAN_ABORT>0</NOTIFY_CAN_ABORT>
<NOTIFY_CAN_DELAY>0</NOTIFY_CAN_DELAY>
<NEED_DONE_ACTION>0</NEED_DONE_ACTION>
<NEED_DONE_ACTION_TEXT/>
| XML Tag | Definition |
|---|---|
| PRI | Priority number (between 0 and 9) |
| ACT | Deployment action (EXECUTE / LAUNCH / STORE) |
| PROTO | Protocol (HTTP / HTTPS) |
| COMMAND/PATH | Command to execute/launch or path to store file |
| NOTIFY_USER | Notify the user before deployment (0 for disabled / 1 for enabled) |
| NOTIFY_TEXT | Text for NOTIFY_USER (disabled if NOTIFY_USER is set to 0) |
| NOTIFY_COUNTDOWN | Countdown for NOTIFY_USER (disabled if NOTIFY_USER is set to 0) |
| NOTIFY_CAN_ABORT | User can abort the deployment (0 for disabled / 1 for enabled) |
| NOTIFY_CAN_DELAY | User can delay the deployment (0 for disabled / 1 for enabled) |
| NEED_DONE_ACTION | Deployment need done action by the user (0 for disabled / 1 for enabled) |
| NEED_DONE_ACTION_TEXT | Done action text (disabled if NEED_DONE_ACTION is set to 0) |
Template example
You can find an example of interaction and option template below.
Interaction template
<?xml version="1.0" encoding="UTF-8"?>
<interactiondefinition>
    <id>example</id>
    <name>9312</name>
    <refos>windows</refos>
    <imgref>image/example.png</imgref>
    <linkedoptions>exampleopt</linkedoptions>
</interactiondefinition>
Options template
<?xml version="1.0" encoding="UTF-8"?>
<optionsdefinition>
    <id>exampleopt</id>
    <name>9315</name>
    <refint>example</refint>
    <replace>true</replace>

    <formoption>
        <formblock>
            <id>FORMTYPE</id>
            <label/>
            <mandatory/>
            <type>hidden</type>
            <disabled>false</disabled>
            <defaultvalue>exampleopt</defaultvalue>
            <specialcharallowed>false</specialcharallowed>
        </formblock>
        <formblock>
            <id>NAME</id>
            <label>1037</label>
            <mandatory>required</mandatory>
            <type>text</type>
            <disabled>false</disabled>
            <defaultvalue/>
            <specialcharallowed>false</specialcharallowed>
            <javascript>onkeyup="verifPackageName(this);"</javascript>
        </formblock>
        <formblock>
            <id>DESCRIPTION</id>
            <label>53</label>
            <mandatory>required</mandatory>
            <type>text</type>
            <disabled>false</disabled>
            <defaultvalue/>
            <specialcharallowed>true</specialcharallowed>
        </formblock>
        <formblock>
            <id>SelectField</id>
            <label>448</label>
            <mandatory>true</mandatory>
            <type>select</type>
            <disabled>false</disabled>
            <defaultvalue/>
            <options>
                <option>
                    <id>0</id>
                    <name>454</name>
                </option>
                <option>
                    <id>1</id>
                    <name>455</name>
                </option>
            </options>
            <specialcharallowed>false</specialcharallowed>
            <javascript>onchange="myFunction()"</javascript>
        </formblock>
    </formoption>

    <packagebuilder>
        <filesinarchive/>
    </packagebuilder>

    <packagedefinition>
        <PRI>5</PRI>
        <ACT>EXECUTE</ACT>
        <PROTO>HTTP</PROTO>
        <COMMAND>example.exe</COMMAND>
        <NOTIFY_USER>0</NOTIFY_USER>
        <NOTIFY_TEXT/>
        <NOTIFY_COUNTDOWN/>
        <NOTIFY_CAN_ABORT>0</NOTIFY_CAN_ABORT>
        <NOTIFY_CAN_DELAY>0</NOTIFY_CAN_DELAY>
        <NEED_DONE_ACTION>0</NEED_DONE_ACTION>
        <NEED_DONE_ACTION_TEXT/>
    </packagedefinition>
</optionsdefinition>