Windows deployment templates
Summary
Install / Uninstall
Scripts
Others
Install MSI application
To install MSI application, go to Deployment > Build > Windows > Install / Uninstall and click on Install MSI application.
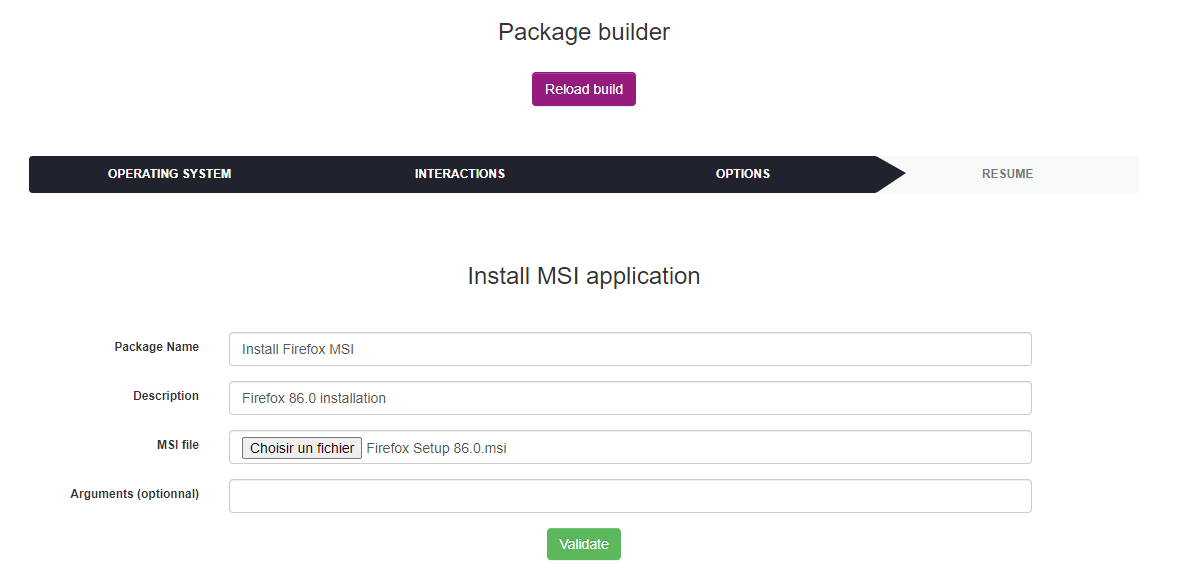
List of MSI installation's form parameters :
- Package Name : the package display name
- Description : the package description
- MSI file : MSI file to be deployed
- Arguments : MSI command line arguments (optionnal)
Below the list of default MSI installation's parameters (not configurable by the user):
- Priority : 5
- Action : Execute
- Protocole : HTTP
- Command : msiexec /i application.msi {custom arguments}
- Notify User : No
- Notify can abort : No
- Notify can delay : No
- Need done action : No
Next, click on Validate. After the package has been created its resume is displayed.

The fragments number and the Activated column value depends on your deployment configuration. For more informations see Deployment configuration.
Update Windows Agent
Note : To create update package, you need to create a Windows Agent setup with OCS Packager and all command line parameters inside before. For more informations, read Use OCSPackager documentation.
To update Windows Agent, go to Deployment > Build > Windows > Install / Uninstall and click on Update Agent.

List of Update agent's form parameters :
- Package Name : the package display name
- Description : the package description
- Packager file : OCS Agent setup generate by OCS Packager
Below the list of default Update agent's parameters (not configurable by the user):
- Priority : 5
- Action : Execute
- Protocole : HTTP
- Command : powershell.exe -File scheduledupdateagent.ps1
- Notify User : No
- Notify can abort : No
- Notify can delay : No
- Need done action : No
Next, click on Validate. After the package has been created its resume is displayed.

The fragments number and the Activated column value depends on your deployment configuration. For more informations see Deployment configuration.
Note : the Update Agent deployment uninstall the old agent to install the new agent properly.
Execute an exe
To execute an exe, go to Deployment > Build > Windows > Install / Uninstall and click on Execute an exe.
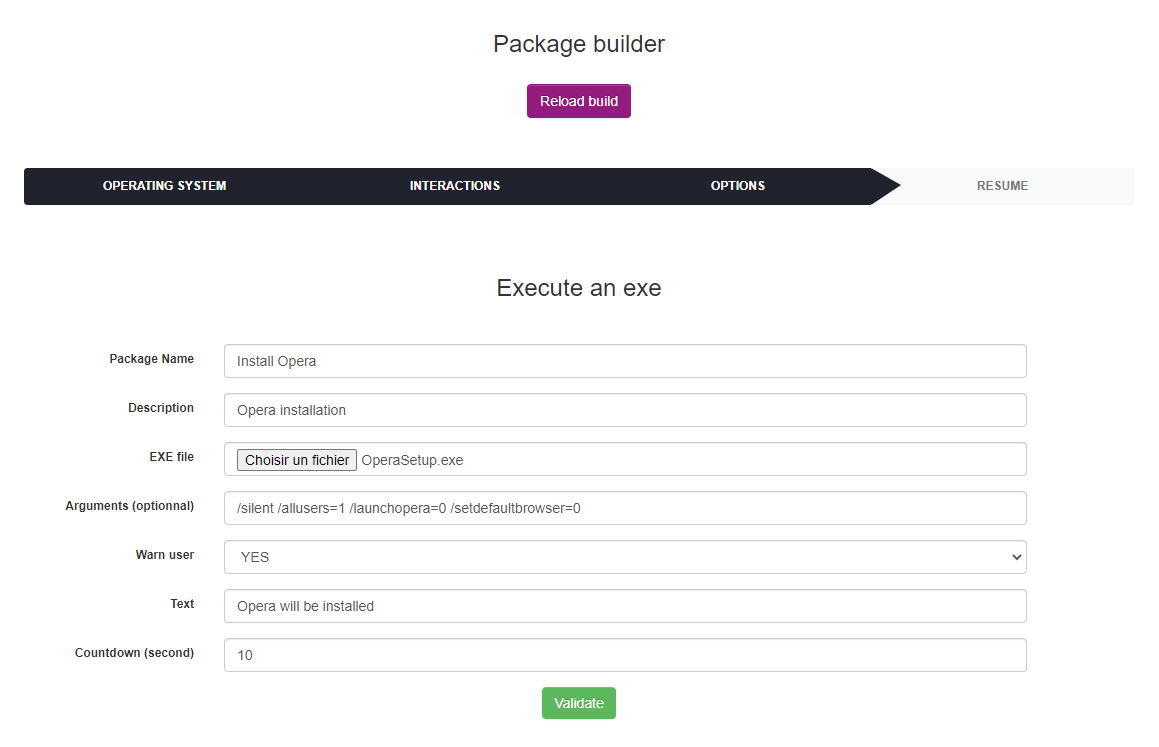
List of Execute an exe's form parameters :
- Package Name : the package display name
- Description : the package description
- EXE file : executable file
- Arguments : command line arguments (optionnal)
- Warn user : warn user before deployment (No by default)
- Text : warn user message (Not visible if warn user at No)
- Countdown : warn user message coutdown (Not visible if warn user at No)
Below the list of default Execute an exe's parameters (not configurable by the user):
- Priority : 5
- Action : Launch
- Protocole : HTTP
- Command : executable.exe {custom arguments}
- Notify can abort : No
- Notify can delay : No
- Need done action : No
Next, click on Validate. After the package has been created its resume is displayed.

The fragments number and the Activated column value depends on your deployment configuration. For more informations see Deployment configuration.
Uninstall application
To uninstall application, go to Deployment > Build > Windows > Install / Uninstall and click on Uninstall application.

List of Uninstall application's form parameters :
- Package Name : the package display name
- Description : the package description
- Application identifier : application name (to find wmic application name, open a cmd as administrator and run
wmic product get name) - Warn user : warn user before deployment (No by default)
- Text : warn user message (Not visible if warn user at No)
- Countdown : warn user message coutdown (Not visible if warn user at No)
Below the list of default Uninstall application's parameters (not configurable by the user):
- Priority : 5
- Action : Execute
- Protocole : HTTP
- Command : wmic product where (name='{application identifier}') call uninstall
- Notify can abort : No
- Notify can delay : No
- Need done action : No
Next, click on Validate. After the package has been created its resume is displayed.

The fragments number and the Activated column value depends on your deployment configuration. For more informations see Deployment configuration.
Notice : some application uninstallations might trigger a system reboot.
Powershell Script
To create a powershell script package, go to Deployment > Build > Windows > Scripts and click on Powershell script.
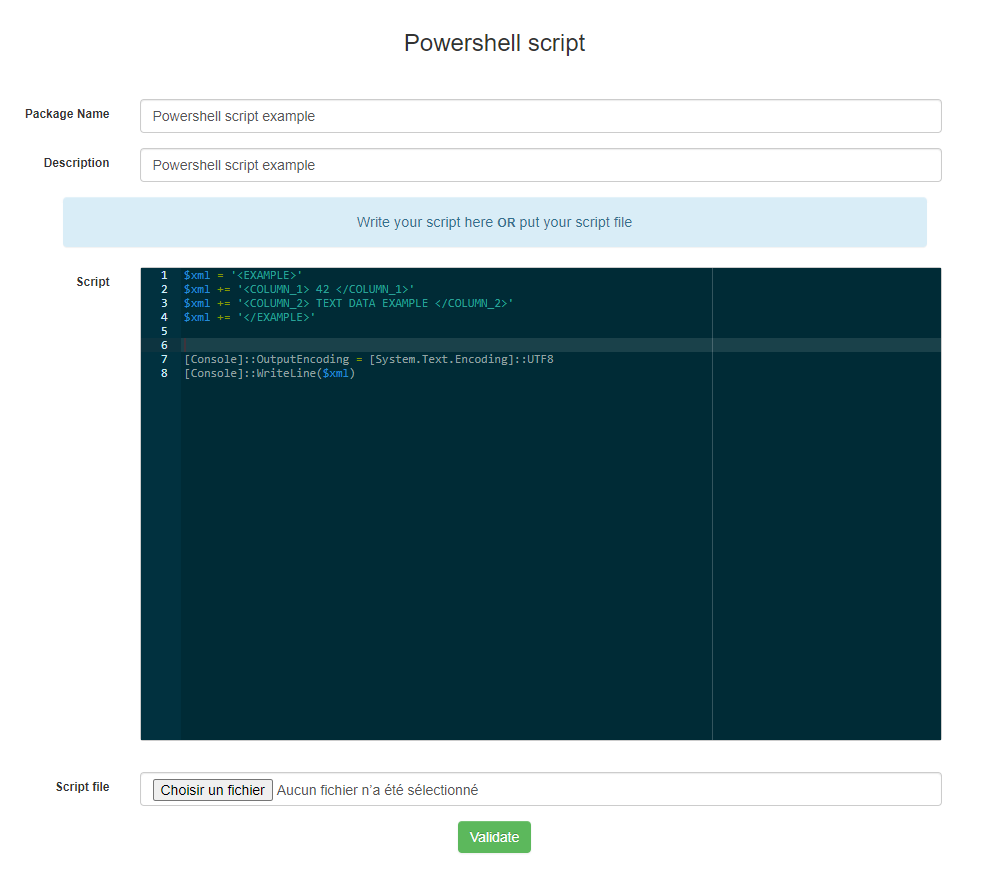
List of Powershell script's form parameters :
- Package Name : the package display name
- Description : the package description
- Script : area to write powershell script
- Script file : powershell script file
Note : if you write script on Script area don't put script file and vice versa.
Below the list of default Powershell script's parameters (not configurable by the user):
- Priority : 5
- Action : Execute
- Protocole : HTTP
- Command : powershell.exe -File psscript.ps1
- Notify User : No
- Notify can abort : No
- Notify can delay : No
- Need done action : No
Next, click on Validate. After the package has been created its resume is displayed.

The fragments number and the Activated column value depends on your deployment configuration. For more informations see Deployment configuration.
Batch Script
To create a batch script package, go to Deployment > Build > Windows > Scripts and click on Batch script.
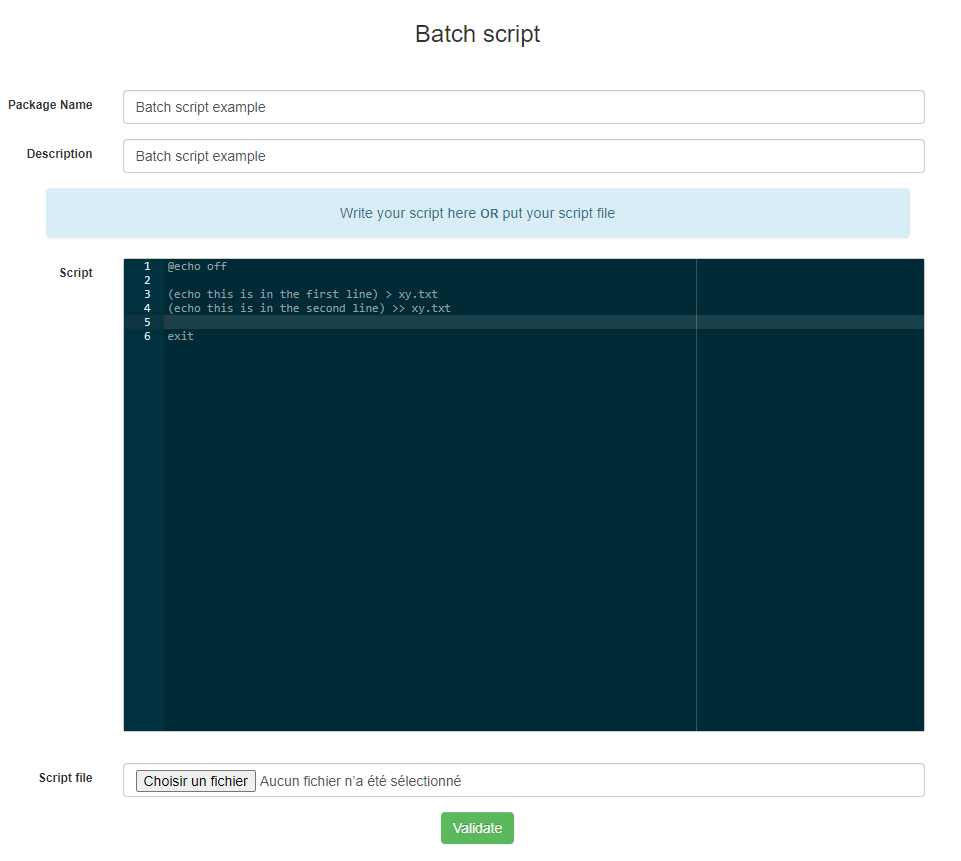
List of Batch script's form parameters :
- Package Name : the package display name
- Description : the package description
- Script : area to write batch script
- Script file : batch script file
Note : if you write script on Script area don't put script file and vice versa.
Below the list of default Batch script's parameters (not configurable by the user):
- Priority : 5
- Action : Execute
- Protocole : HTTP
- Command : batchscript.bat
- Notify User : No
- Notify can abort : No
- Notify can delay : No
- Need done action : No
Next, click on Validate. After the package has been created its resume is displayed.

The fragments number and the Activated column value depends on your deployment configuration. For more informations see Deployment configuration.
Store file or folder
To create a store file/folder package, go to Deployment > Build > Windows > Others and click on Store file/folder.
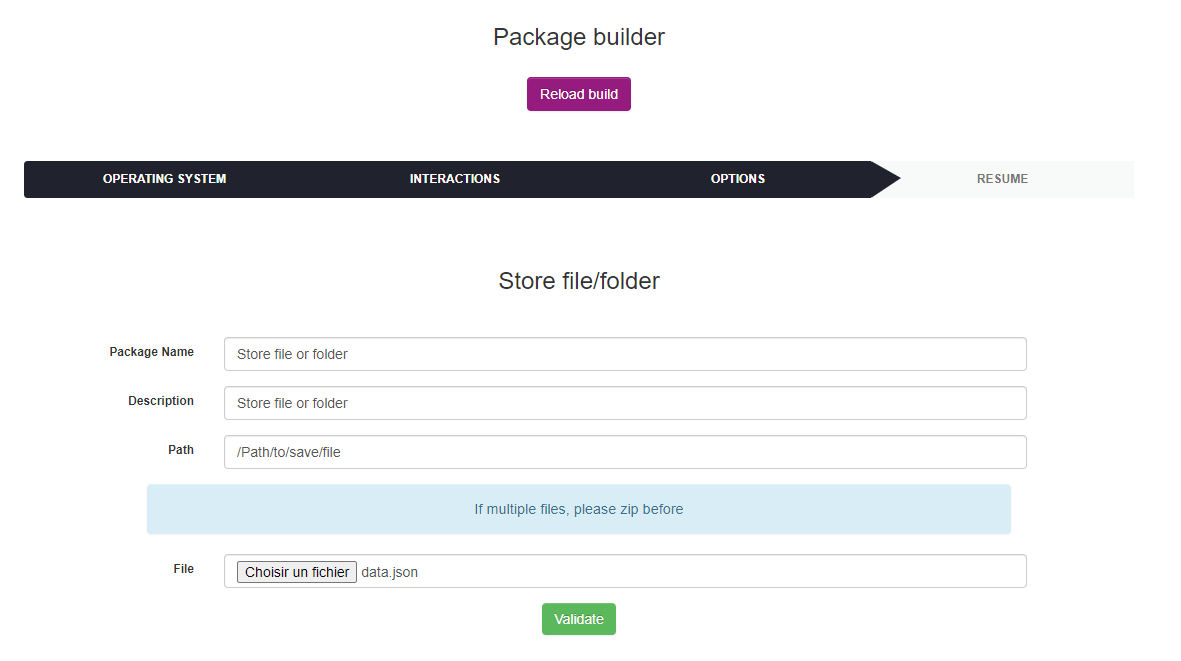
List of Store's form parameters :
- Package Name : the package display name
- Description : the package description
- Path : path to store file or folder
- File : file or folder to store
Note : if you want to store multiple files, compress before.
Below the list of default Batch store's parameters (not configurable by the user):
- Priority : 5
- Action : Store
- Protocole : HTTP
- Path : {custom path}
- Notify User : No
- Notify can abort : No
- Notify can delay : No
- Need done action : No
Next, click on Validate. After the package has been created its resume is displayed.

The fragments number and the Activated column value depends on your deployment configuration. For more informations see Deployment configuration.
Custom package
To create a custom package go to Deployment > Build > Windows > Others and click on Custom package.
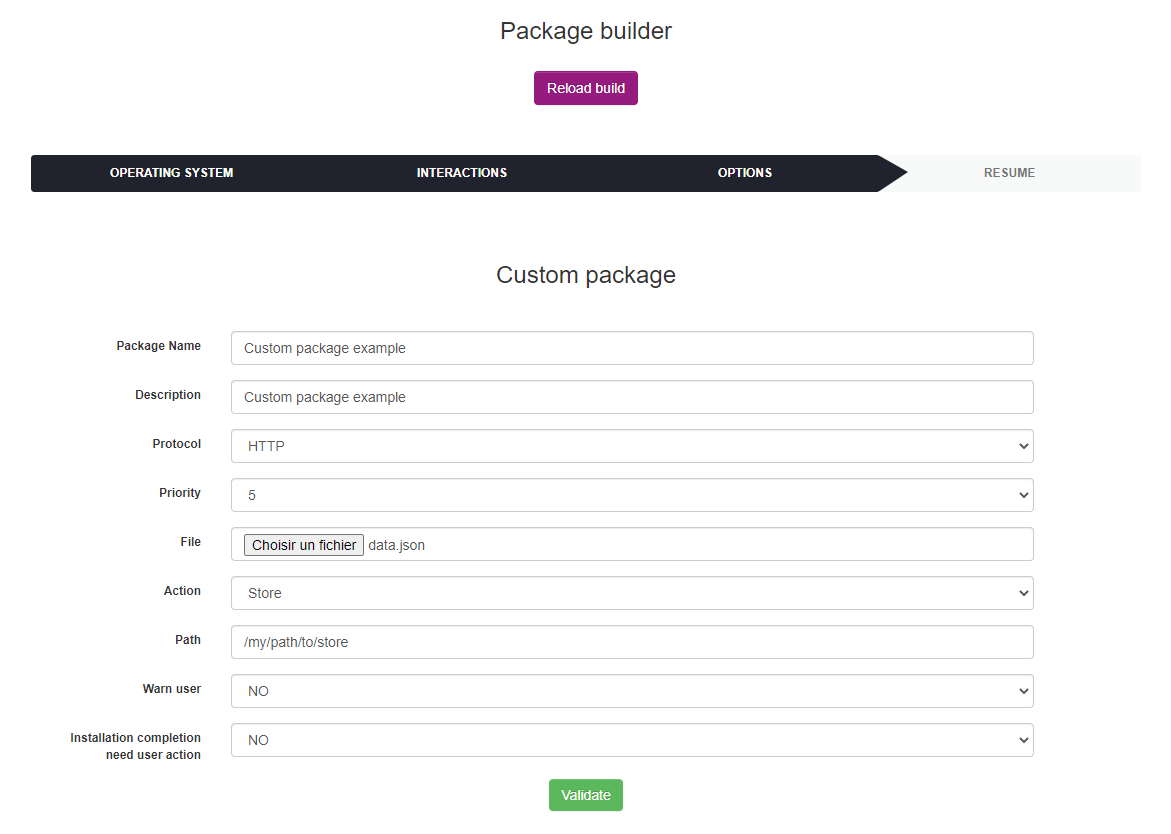
List of Custom package's form parameters :
- Package Name : the package display name
- Description : the package description
- Protocol : HTTP/HTTPS
- Priority : deployment priority
- File : file to deploy
- Action : Execute/Launch/Store
- Command/Path : set the command or the path (depends on selected action)
- Warn user : display message before deployment
Next, click on Validate. After the package has been created its resume is displayed.

The fragments number and the Activated column value depends on your deployment configuration. For more informations see Deployment configuration.