Using IP discovery feature
IP discovery feature allow OCS Inventory to discover all network connected devices on the network.
For this, Communication server asks a number of most “active” computers running OCS Inventory agent to scan for MAC addresses in their sub network at each run. They will not scan the entire wide area network, but only their local network defined by the couple IP address/subnet mask.
Introduction
Inventory software is very useful for an administrator. It allows them to "take stock" of their network. Today, with the use of TCP/IP, we can say that this is can be done at the same time for the entire enterprise network, especially if, like OCS Inventory, work is natively on a network basis.
But, what about devices which for one reason or another (i.e. uncooperative users) do not send their inventory? This could include; all “alive” devices which cannot run inventory agent (printers, switches, routers, WiFi access points…). Computers which do not have to be connected on your network and which are conspicuous by their absence?
IPDISCOVER trys to answer those problems. Even if it is used independently, it works perfectly with the OCS structure. As it is based on a client server based communication, it’s easy for the server to order it's “subordinate” client to perform some tasks, such as getting registry keys, doing an inventory or retrieving all devices answering on the IP segment.
How does it work?
Retrieving information
The OCS Inventory system is based on a dialog between an agent installed on host computers and a Apache module installed on a OCS NG server.The exchange is done in compressed XML and allows configuring the agent to perform tasks.
When a computer sends an inventory result, the server will try to determine if it needs some other computers (number can be configured) to scan hosts in this subnet.By using the Gateway IP address a map of the enterprise network is formed.
If required,the server estimates host quality and decide whether or not to activate the host as an ipdiscovered computer. In this case, computer will systematically send an inventory result, independently of the general configuration parameter 'FREQUENCY'.
Election mechanism
Once the server has determined that there is a need for the selected gateway, it evaluates the following criteria:
- OS: operating system must be Windows XP or Windows 2000 (all versions) or Linux.
- QUALITY: this parameter means the host connection average to the server in days. It is evaluated dynamically by Communication server only when there is more than the number (defined by ‘IPDISCOVER’ option) of inventoried hosts for a gateway. If the current computer sending inventory results has better quality than another IPDISCOVER enabled computer for this gateway, the current computer will replace the other one. ‘IPDISCOVER’ option must be greater than zero to enable this feature!
- FIDELITY: total connection number to the server of the computer. This number must be at least 3, to allow QUALITY to be computed from representative data.
- NETMASK: subnet mask. It must describe a maximum of a B class IP network (2 first bytes to 255 => 255.255.X.X).
- LASTDATE: when the Communication server computes QUALITY, if it finds a host which hasn’t sent inventory results from number of days defined by ‘IPDISCOVER_MAX_ALIVE’ option, it will replace this host by a new one.
Note: You can customize agent’s ipdiscover settings for each computer from the administration console. You can totally disable ipdiscover or force ipdiscover on a specific network. These options are available on the computer properties page, under “Customization” section. However, the election mechanism is the best way to do the network discovery. Use ipdiscover customization with care.
How do agents work?
Once agent has received order to proceed to discovery of his sub network, it identifies first network interface to use. It tries then to resolve through ARP all IP addresses answering on his segment (delay between 2 hosts scan may be defined using option “IPDISCOVER_LATENCY”, see Managing OCS Inventory general options). All devices answering to the question are stored in XML inventory result and sent to server.
Server tuning
When doing a new installation of OCS Inventory, we understand easily that it requires some times to be ready to enable ipdiscovery feature. It requires some times to grab all gateways and to elect computers for ipdiscovery. As a computer can only be elected if it REALLY provides an inventory, it may be wiser to configure at the beginning ‘FREQUENCY’ option to zero, always generate an inventory. You can increase this value later, when infrastructure will be ready.
Analyzing errors (thought ipdiscover-util.pl used directly or from web interface) will allow you to detect potential problems. More the value of QUALITY will be lesser, more your ipdiscover information will be up to date.
System will be giving you the best in a domain, with a daily authentication and inventory. Tests done with this configuration on 20 000 hosts and 250 sub networks generate a DAILY actualization of 15 000 IP addresses.
To finish, value set for IPDISCOVER will tell to server how many computers are wished by gateway to run this task (if you set this value to zero, feature will be disabled).
Working with results
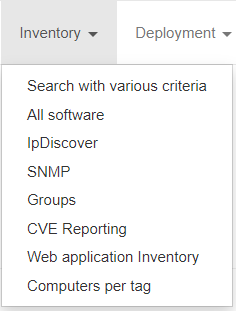
You can view which computers run the IP discovery scans by clicking on toolbar Inventory > IpDiscover menu.
Manage names of your networks
Note: You may define your sub networks by a name and a unique ID, to view results easily.
Note: Since 2.8, you may add TAG computer parameter to define your sub networks. See Administer subnet parapher below.
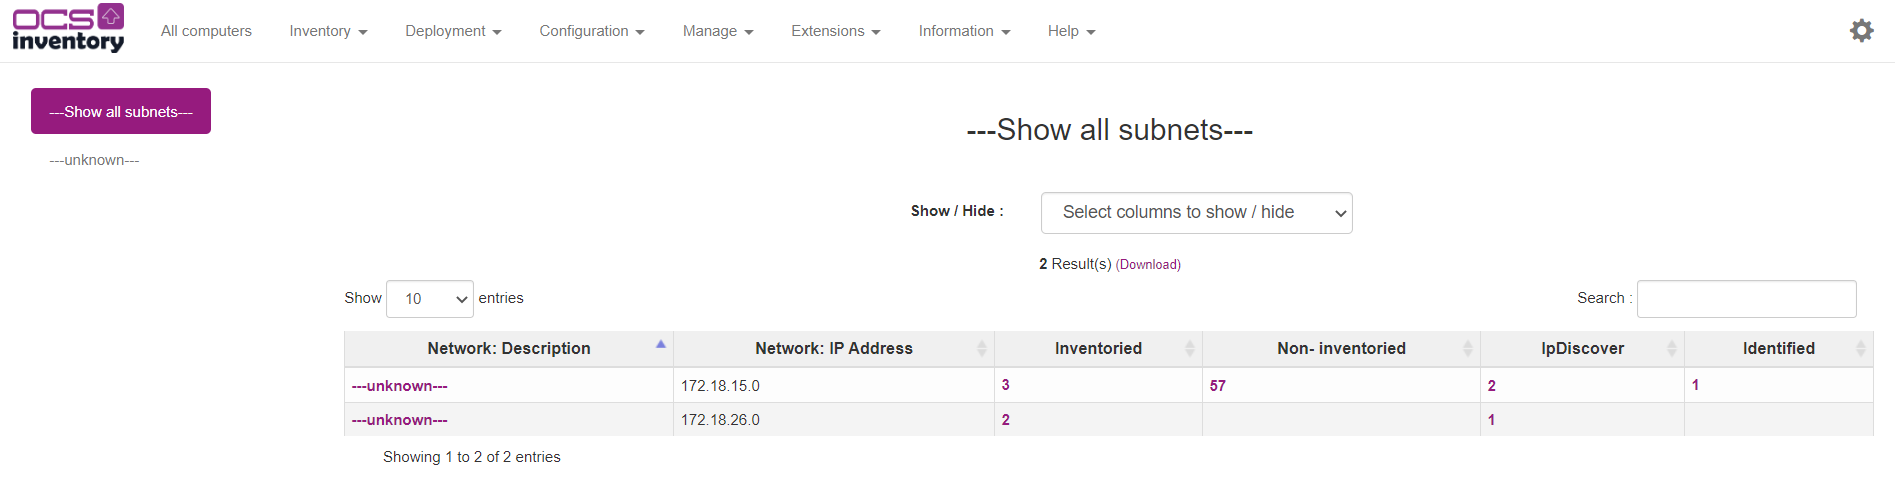
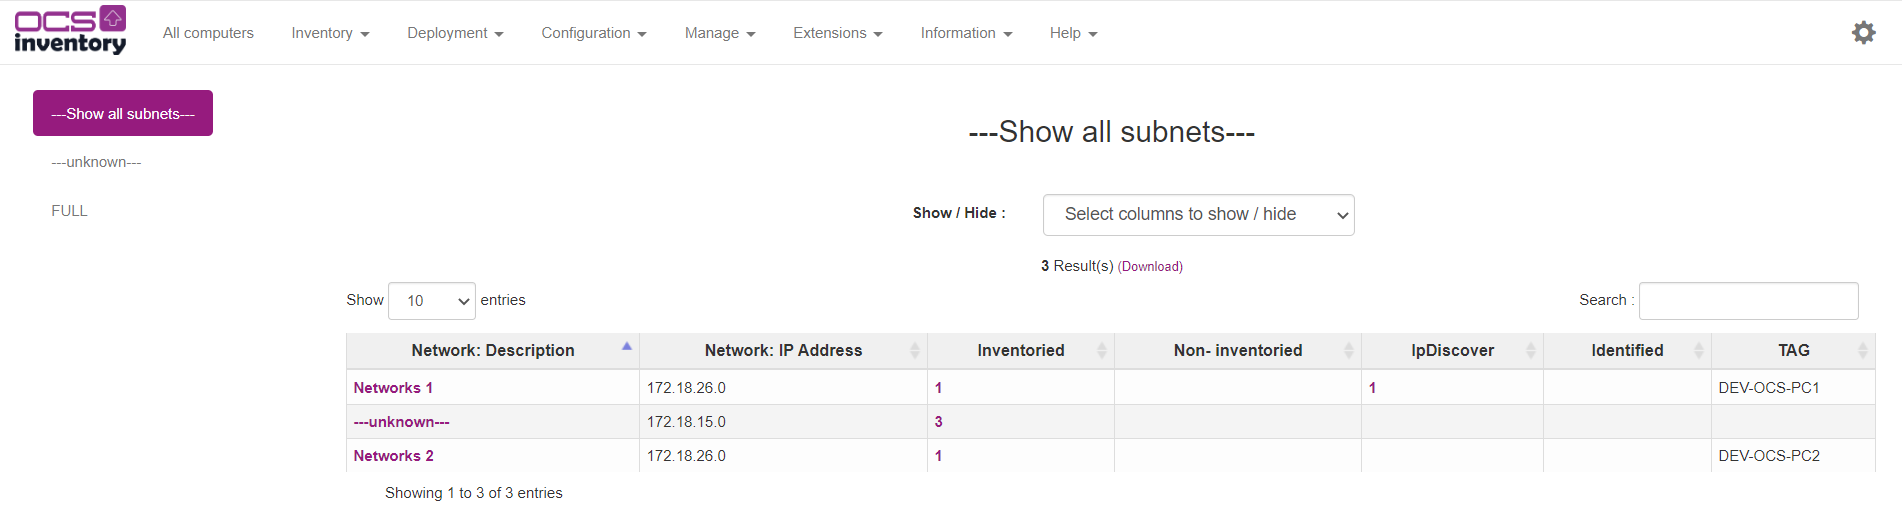
For each network, you will be able to view how many inventoried hosts, non inventoried hosts, IPDISCOVER feature enabled hosts and identified hosts (known hosts manually registered in the database) are connected to this network.
Click on the number of needed column to view each type of devices.
Administer subnet
Without TAG link
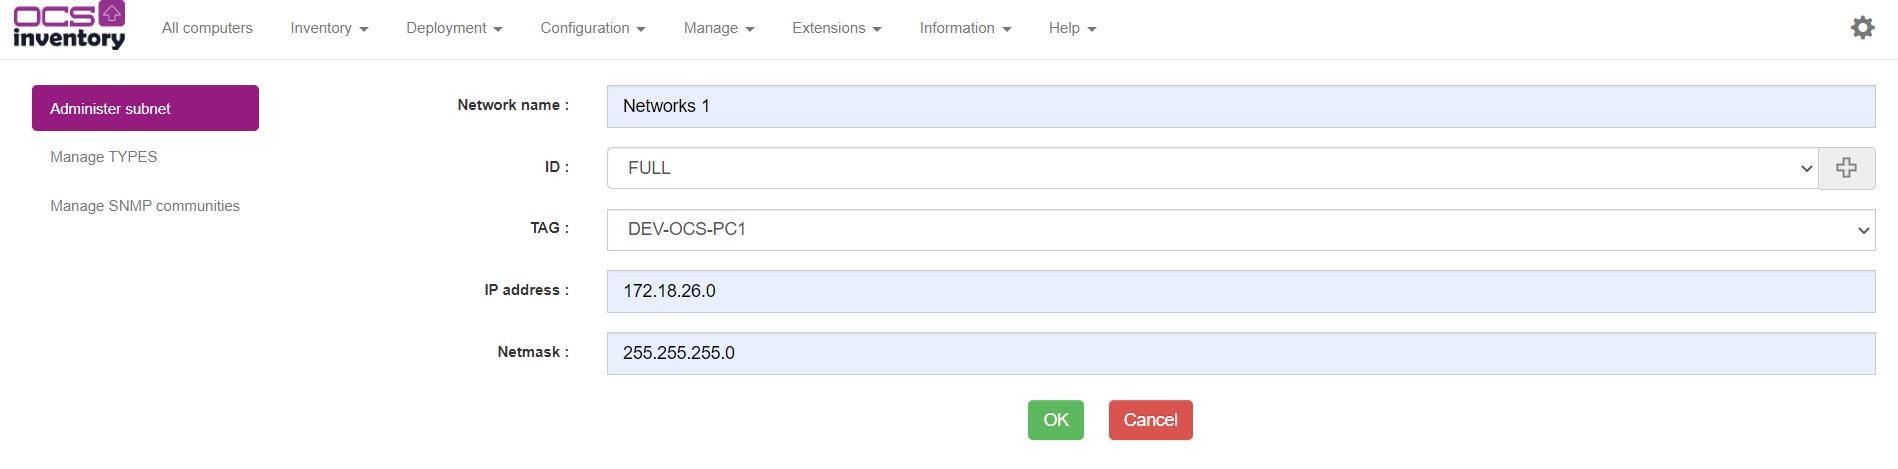
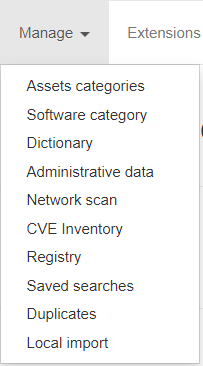
To order your ipdiscover inventory, you can identified your subnet by a Name and an ID. Go to Manage > Network scan, on Administer subnet click on ADD.
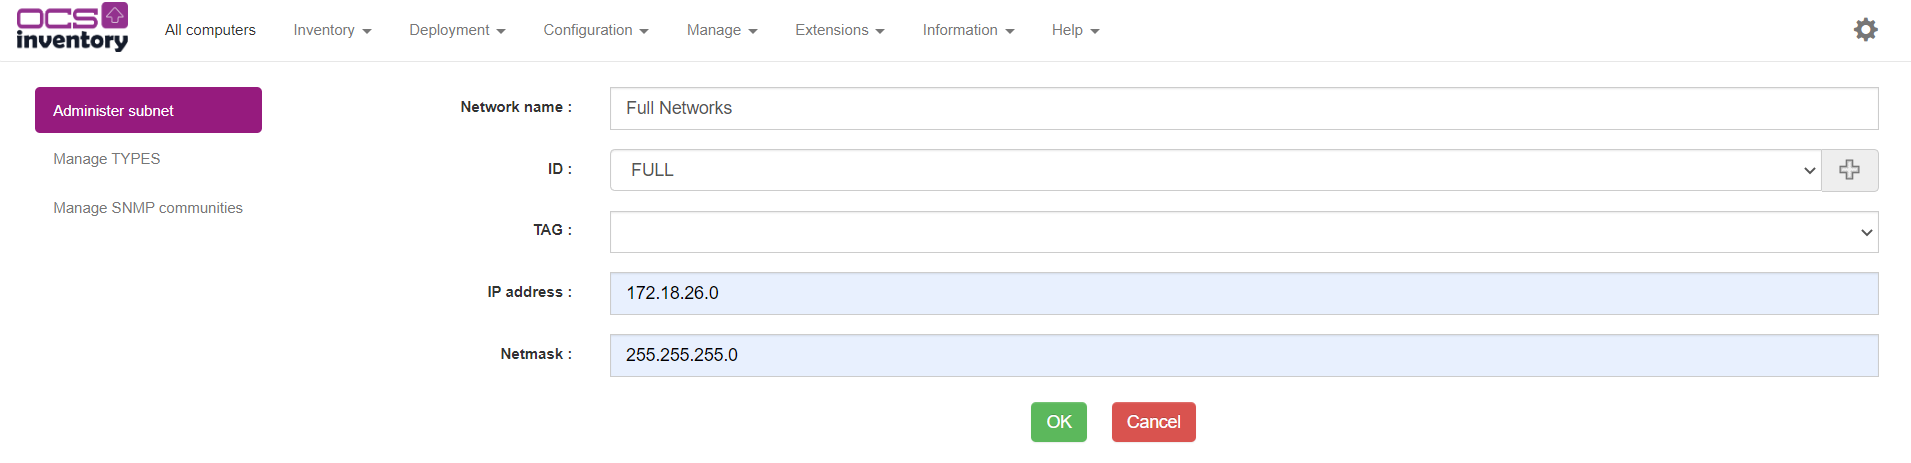
Set the name, the ID, the IP address and network and click on OK.
Note: the TAG field is usable only if IPDISCOVER_LINK_TAG_NETWORK is activate.

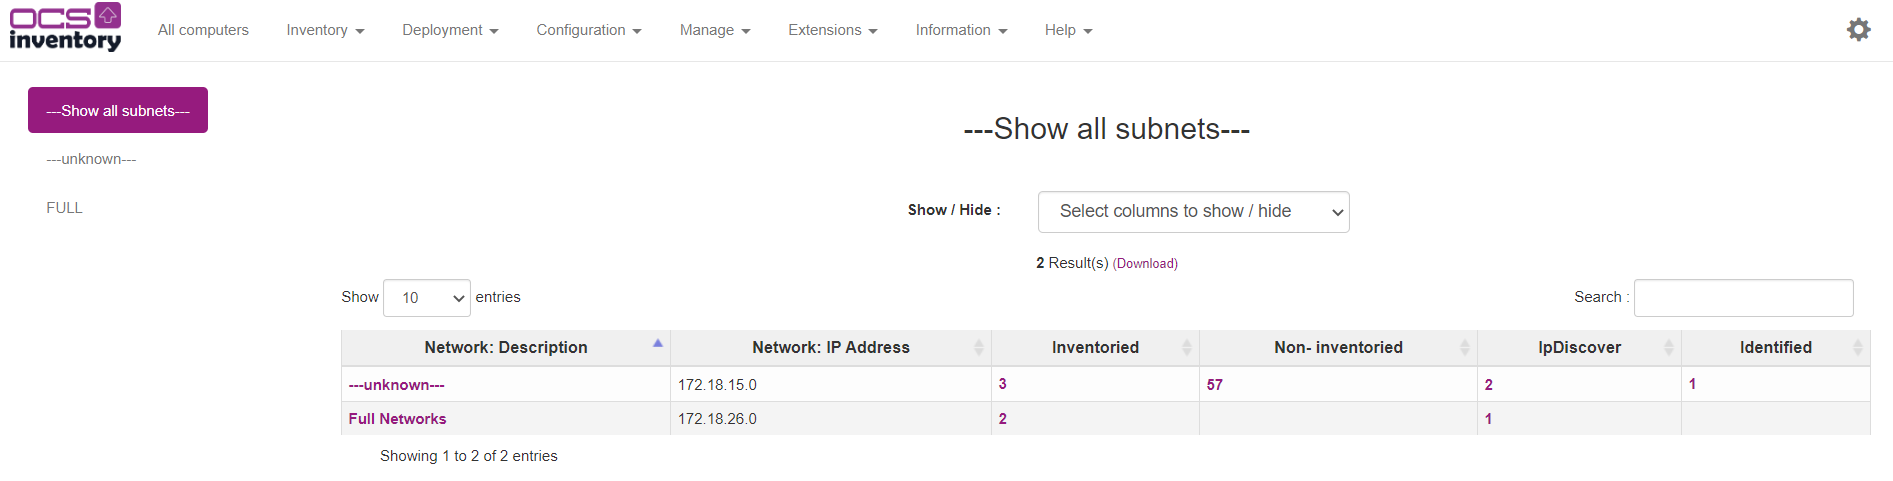
Now if you return on Inventory > IpDiscover, you can see your subnet with network description.
With TAG link
To activate TAG link on ipdiscover pass IPDISCOVER_LINK_TAG_NETWORK at on on configuration page and logout / login. Now, go to Manage > Network scan and create a new subnet with TAG parameter.
Return on Inventory > IpDiscover. Subnets are grouped by IP Adress and TAG.
Show inventoried and non-inventoried hosts in the network
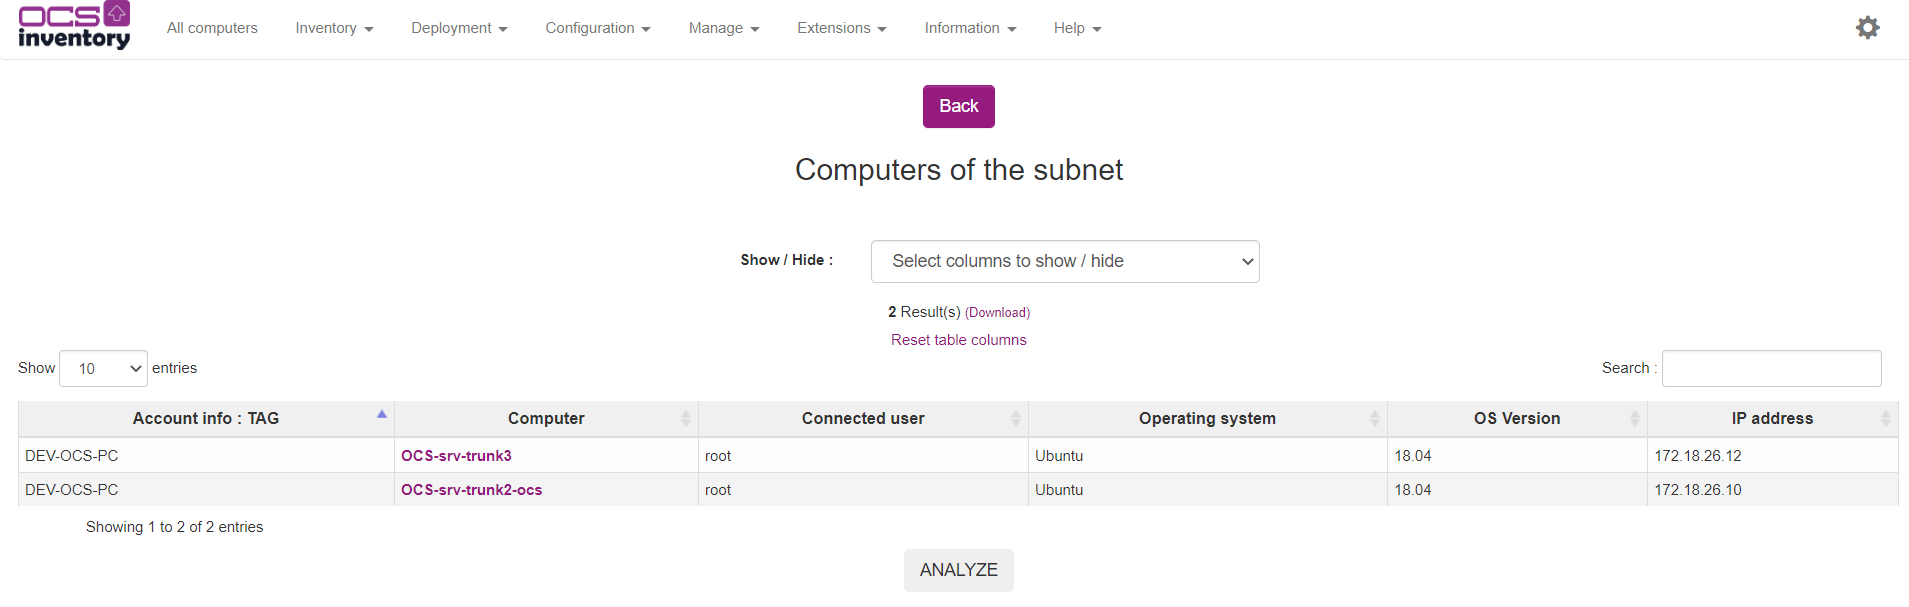
You can view the list of inventoried hosts (computers with OCS Inventory agent installed) on your network by clicking on number in column Inventoried in the network list.
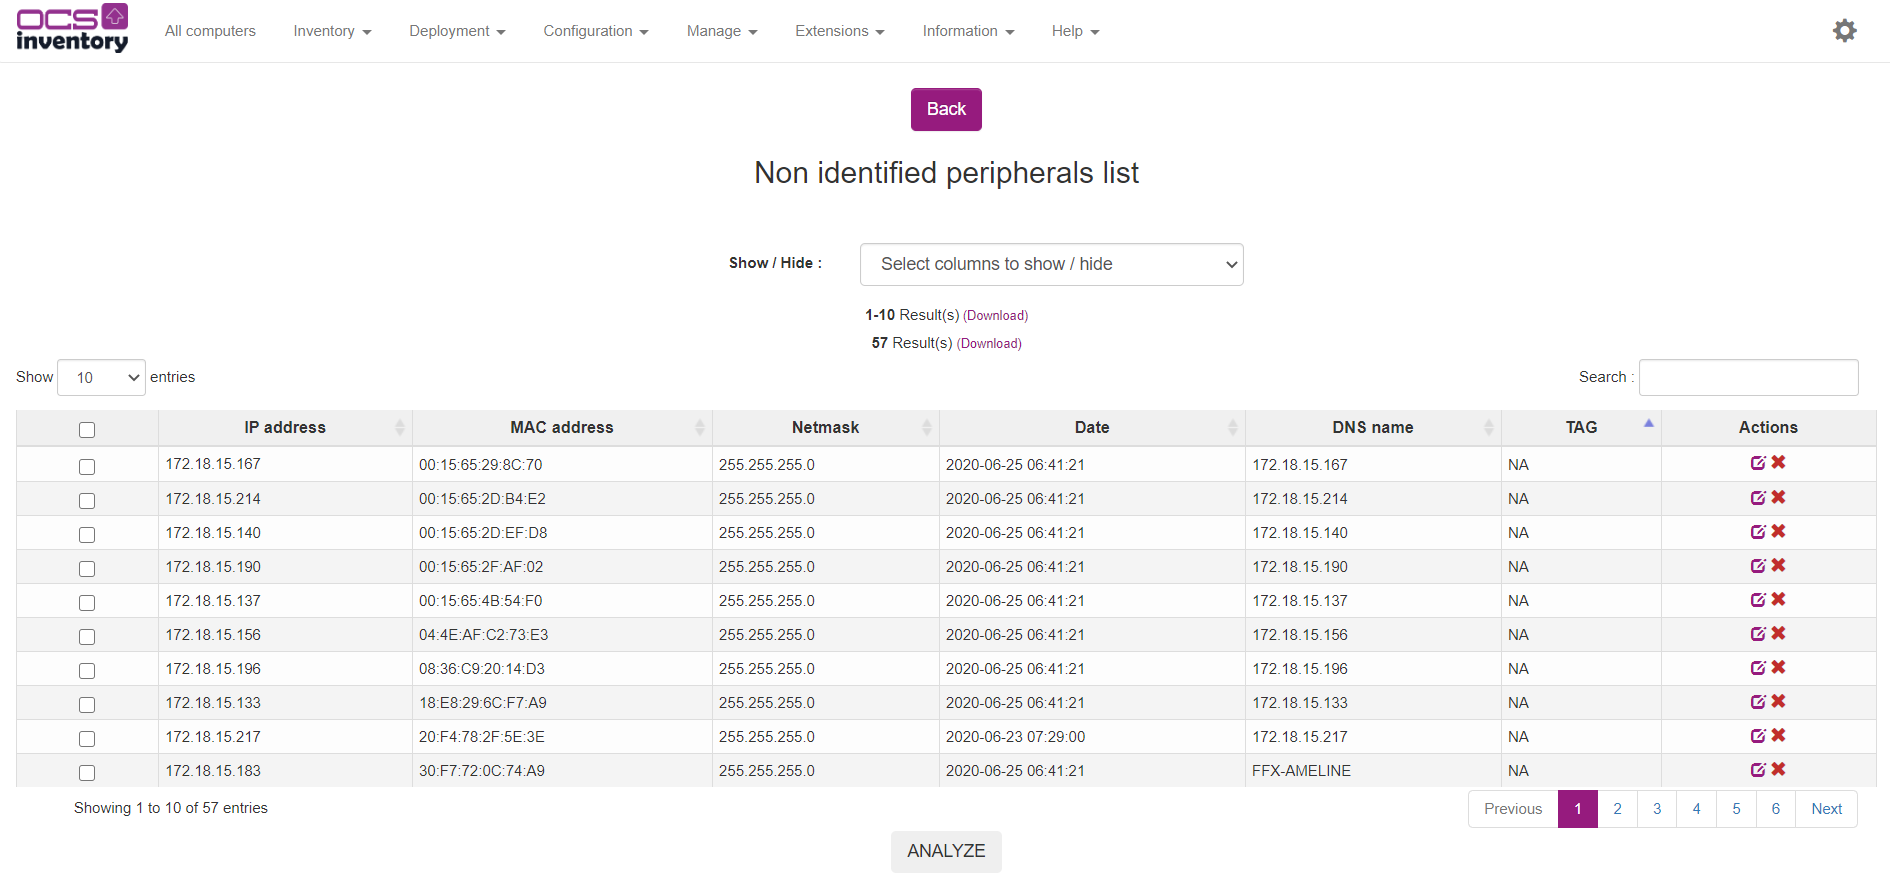
You can view the list of non-inventoried hosts (computers without OCS Inventory agent installed) on your network by clicking on number in column Non-inventoried in the network list.
If there is, in the list, devices you know as legitimate, you can register them so they will not be displayed next time. For this, just click the icon at the end of corresponding line. Before, you may want to register “Device type” to easily identify known hosts (see §7.3.8 Registering known hosts.).
You may also analyze this network by clicking “Analyze” button. IPDISCOVER-UTIL perl script will be used to determine, for each network device, his NetBios name or DNS name and the type of operating system.
This feature uses IPDISCOVER-UTIL perl script available only under Linux Server which requires the following components:
- nmap (tested on 3.75)
- nmblookup (part of the samba suite, tested on 3.0.7/3.0.10)
- Perl module Net::IP
- Perl module DBI
- Perl module DBD::mysql
- Perl module XML::Simple
The following types are used:
- Windows: host seems to run one version of Microsoft Windows operating system.
- Linux: host seems to run under Linux operating system.
- Network: operating system cannot be determined, so it can be network device such as router, managed switch, printer, or host running Sun Solaris or IBM AIX… Maybe, host is running some firewall software?
- Phantom: host is not responding at this time. Maybe it is powered off or there is a firewall ?

If a network device is legitimate, you can register it by clicking on icon “Register” at the end of corresponding line. You will be able to enter a brief description and to select network device type while registering it (see § 7.3.8 Registering known hosts.).
Show IPDISCOVER enabled hosts
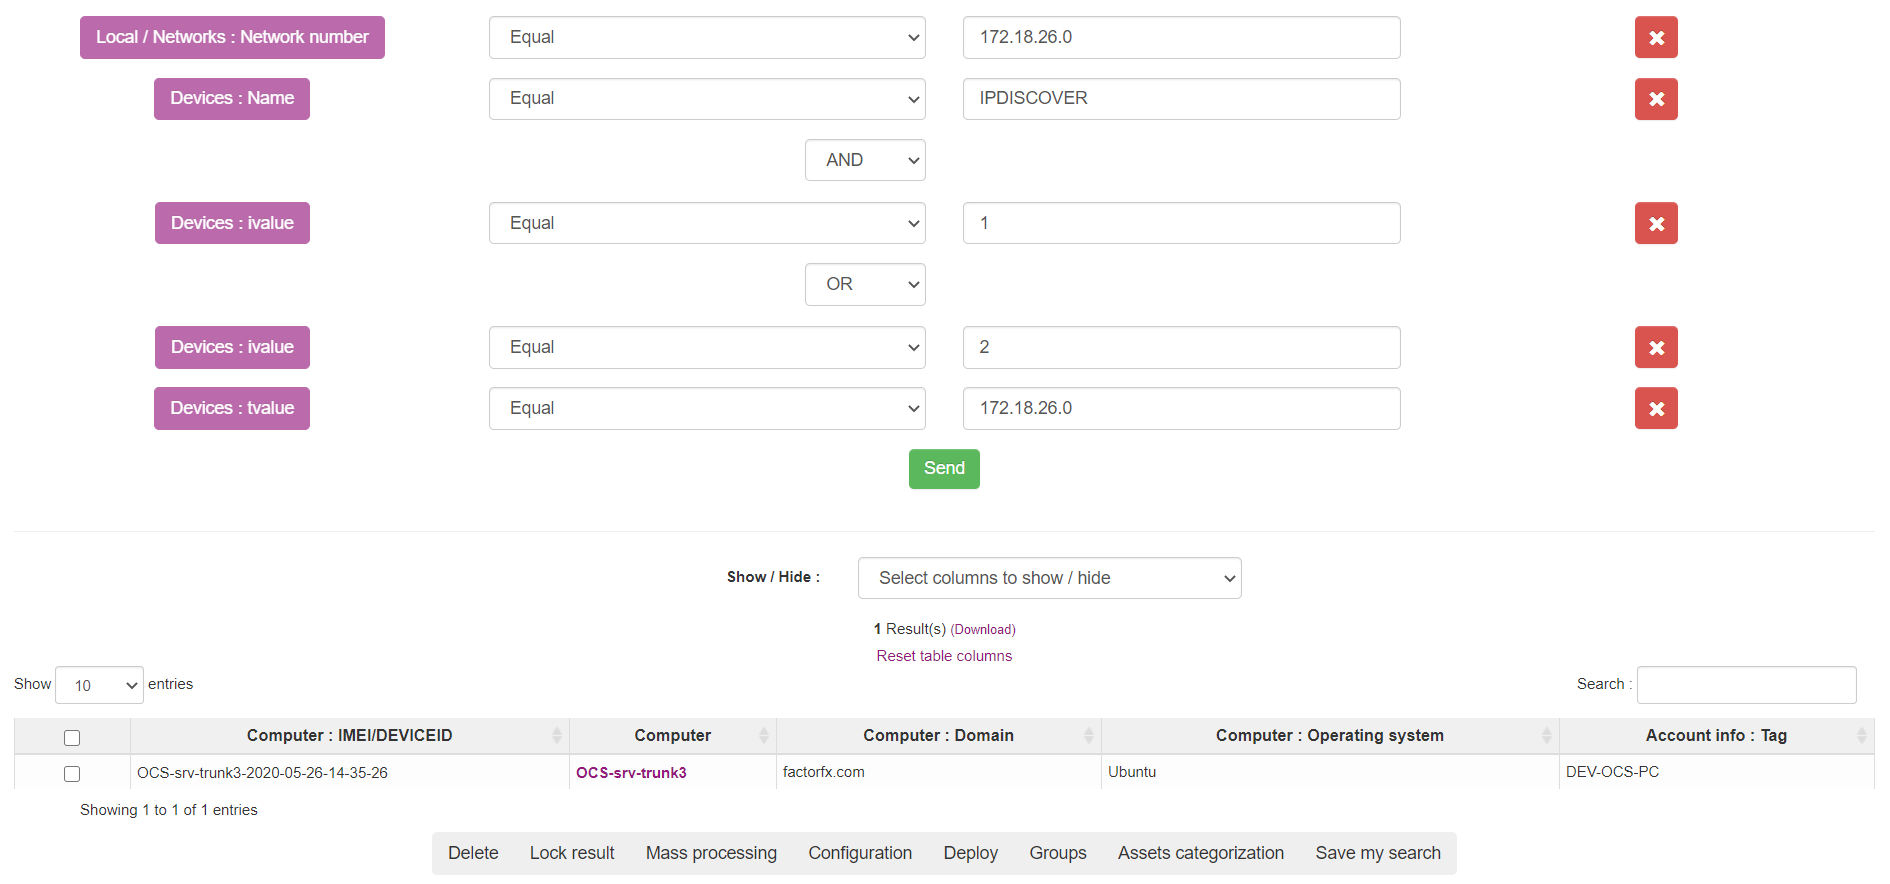
You can view the list of hosts running IPDISCOVERY feature (computers with OCS Inventory agent installed, and this agent is elected by server to run discovery of his sub network) on your network by clicking on number in column IpDiscover in the network list. You are redirected on a multicriteria search.
Show known or identified hosts
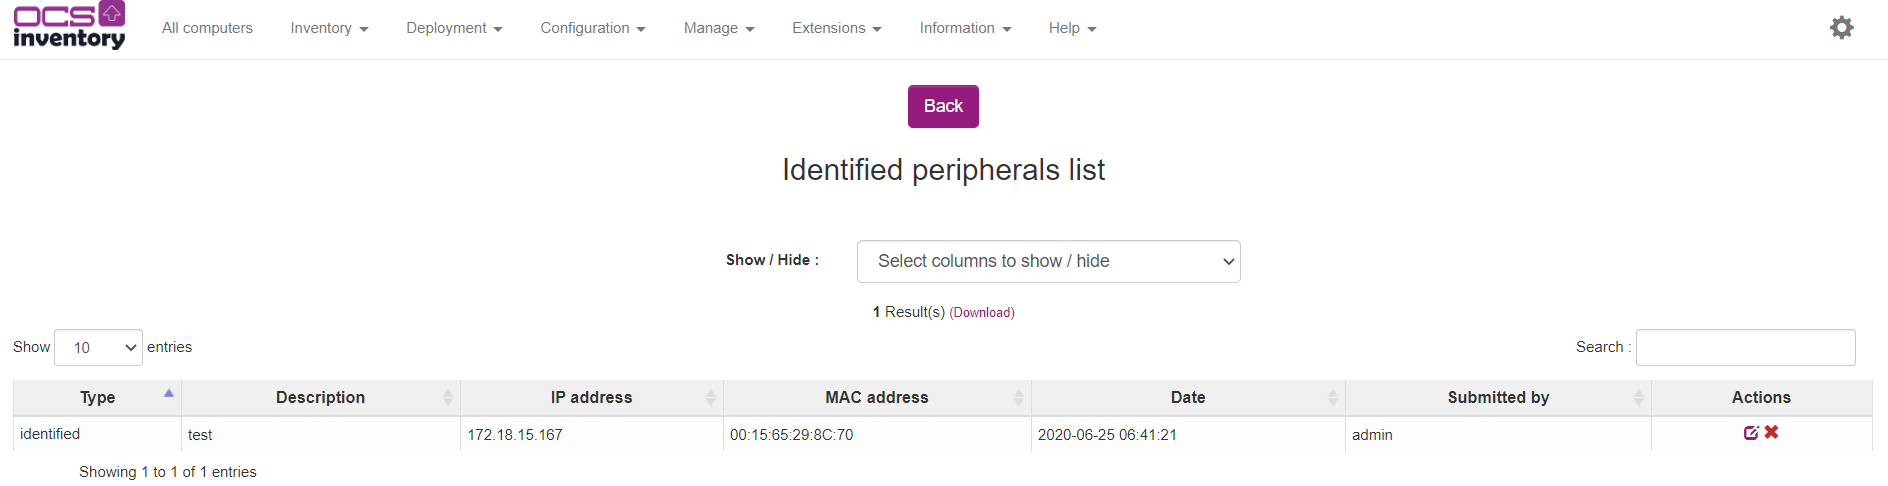
You can view the list of known hosts already identified by someone on your network by clicking on number in column Identified in the network list.
Managing known device types
You can register devices (such as routers, switches, network printers, computers for which there is no inventory agent…) as you know they are legitimate. As is, they will not be displayed in the list of uninventoried devices, to allow you concentrate on suspicious devices.
You may first define some device types to identify them easily.
Click on Manage and then on Network scan and finally on Manage TYPES menu to manage your device types.

You can add new device type by entering the Type name you want and clicking Send button.
You can remove any device type by clicking on the red cross at the end of corresponding line.
Registering known hosts
You can add new devices by browsing list of uninventoried devices and clicking the icon at the end of corresponding line. This will bring you to page for adding or removing network devices and MAC field will be automatically fill in.

To remove a network device, just click on the red cross at the end of corresponding line.
Script to scan IP address
Operating principle
You can make a request to scan a specific IP address to obtain information about a host. In the tarball binutils directory of linux server, the perl script is ipdiscover-util.pl. It use NMAP & NMBLOOKUP utilities to obtain information about the host (DNS name, NetBios, ...), and also to see if the host is inventoried / discovered.
Prerequires
Note: This feature requires the following components :
* nmap (tested on 3.75)
* nmblookup (part of Samba suite, tested on 3.0.7/3.0.10)
* Perl module Net::IP
* Perl module DBI
* Perl module DBD::mysql
* Perl module XML::Simple
* fping
Command line options
USAGE
| Options | Meaning |
|---|---|
| -h | Help menu |
| -ip=X.X.X.X/X.X.X.X (ex: 10.1.1.1/255.255.240.0 or 10.1.1.1/20) | Looks for the ip in a subnet |
| -net=X.X.X.X | Specify a network |
| -a | Launch the analyze |
| -ipdiscover=X | Show all the subnet with up to XX ipdiscover |
| -xml | XML output |
| -list | Show all the networks present in the database with "connected"/"discovered" computers |
| -network=X.X.X.X/X | Subnet to scan (ex: 10.1.1.0/24) |
| -scantype=xxxx | Tool to scan (ping or nmap, default nmap) |
| -tag=xxxxx | if TAG is activated on ipdiscover and subnets are grouped by TAG (default tag is empty) |
DATABASE
| Options | Meaning |
|---|---|
| -p=xxxx | Password (default ocs) |
| -P=xxxx port | Port (default 3306) |
| -d=xxxx | Database name (default ocsweb) |
| -u=xxxx | User (default ocs) |
| -h=xxxx | Server (default localhost) |
Example
Example of command to scan IP 192.168.1.252 and reach back informations in database named ocsdb of mysql server OCSserveur, witch listen on port 3306, using gui account with password ocsrox:
perl ipdiscover-util.pl -ip=192.168.1.252/255.255.255.0 -net=255.255.255.0 -a -xml -h=OCSserveur -u=gui -p=ocsrox -d=ocsdb
Result example:

Scan on server
You can launch a scan from the server with the -network option. You can set the type of scanning with the -scantype option.
Note: If you want to scan with ping, make sure fping is installed.
Examples :
This command will scan the subnet and add all ip in the database :
perl ipdiscover-util.pl -network=10.1.1.0/24 -scantype=ping
This command will scan the subnet and add all ip in the database that are grouped by TAG :
perl ipdiscover-util.pl -network=10.1.1.0/24 -scantype=ping -tag=MYTAG
You can also set multiple networks in the command :
perl ipdiscover-util.pl -network=10.1.1.0/24 -network=10.1.2.0/24 -scantype=nmap
In this way, the script will scan both networks and add all the IP found to the database.